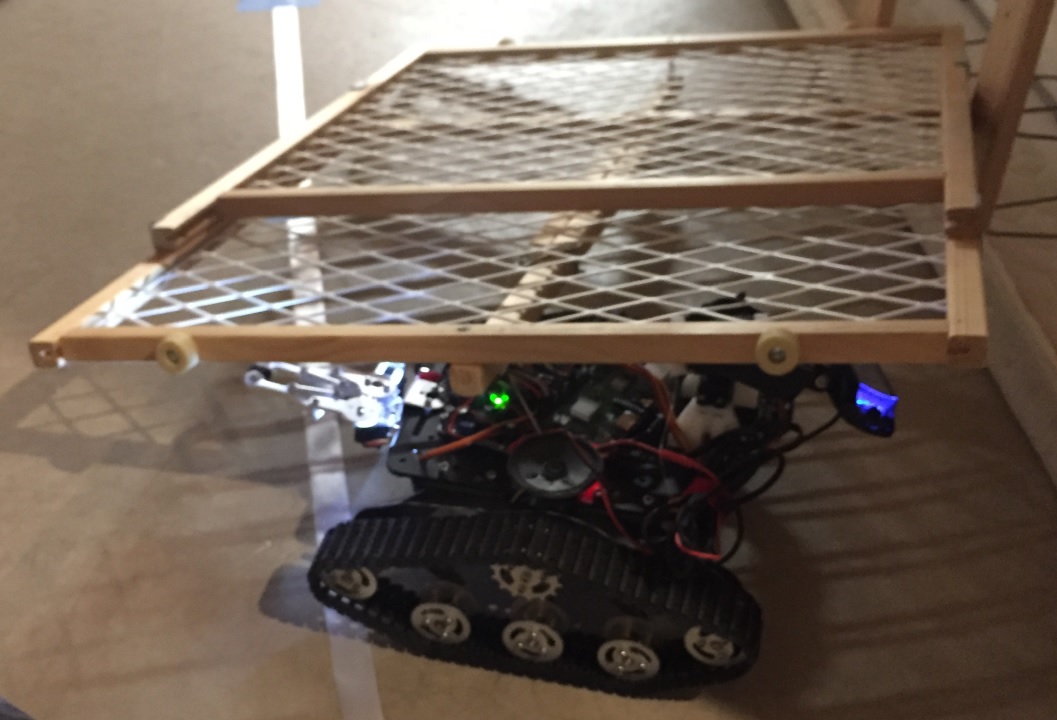
This is a live video streaming tank robot and how it came together. The robot streams live on LetsRobot.tv
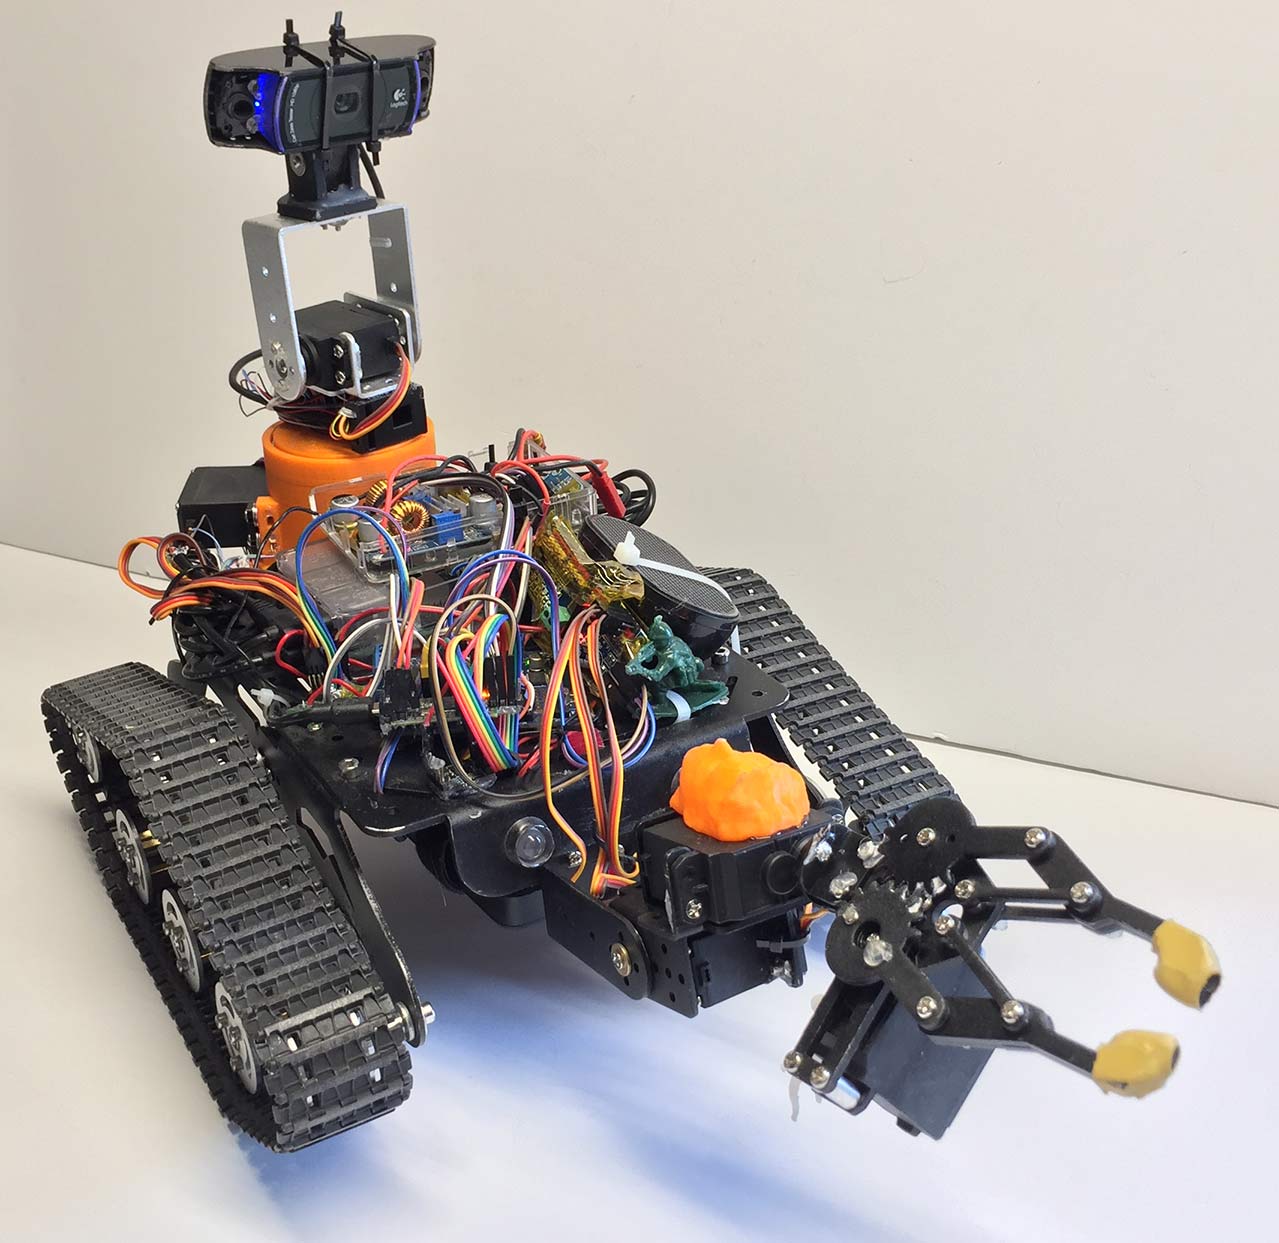
Version 9 added 360 spinnable turret for camera with a much more stable panning mechanism
The turret uses a slip ring to allow full 360 camera spinning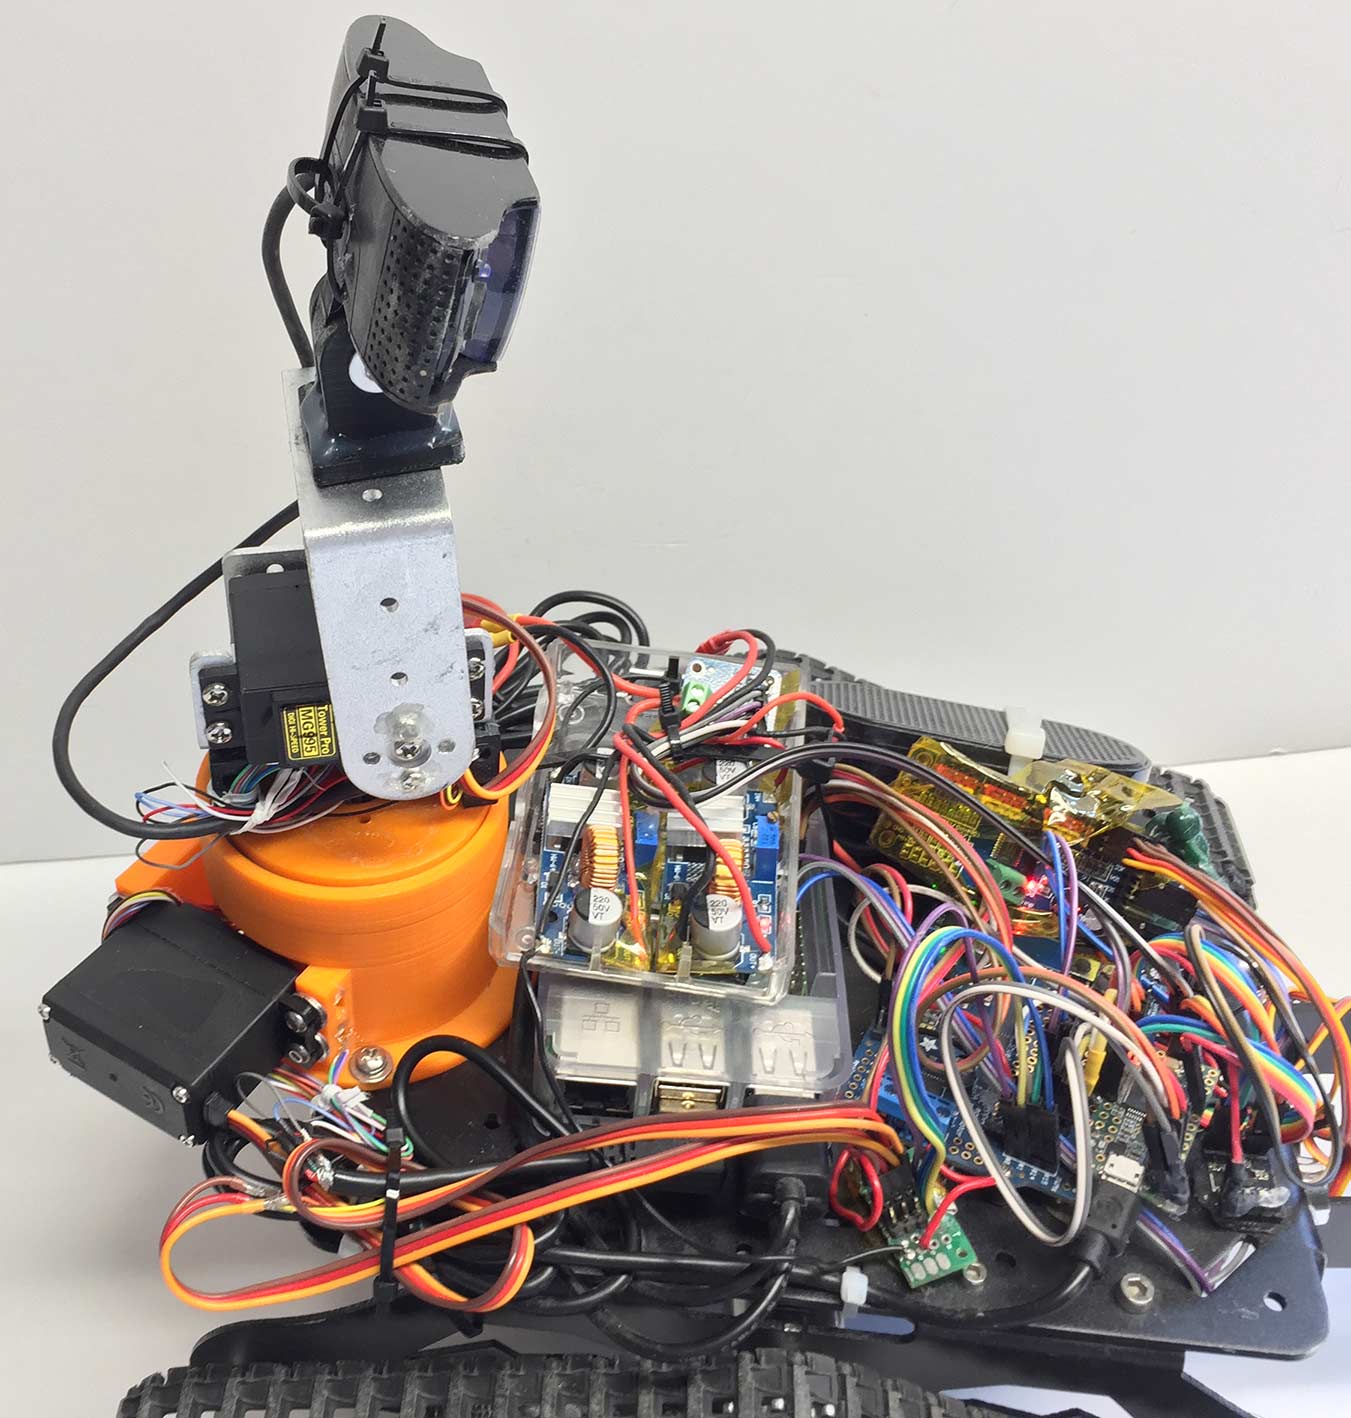
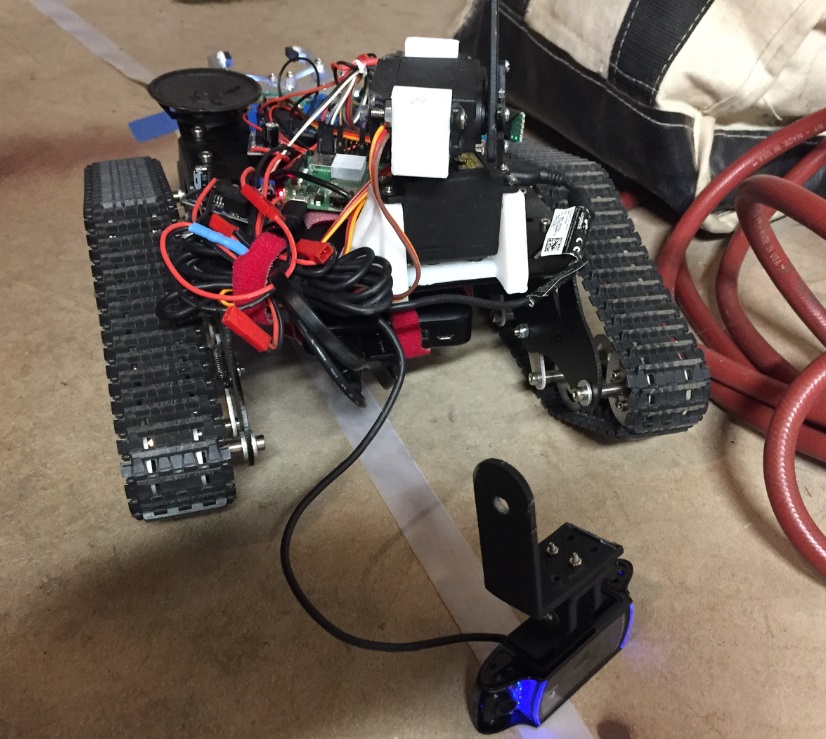
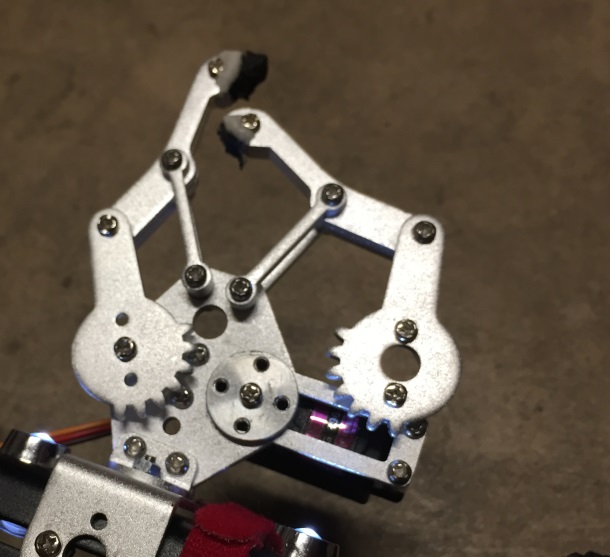
Now with rotatable claw!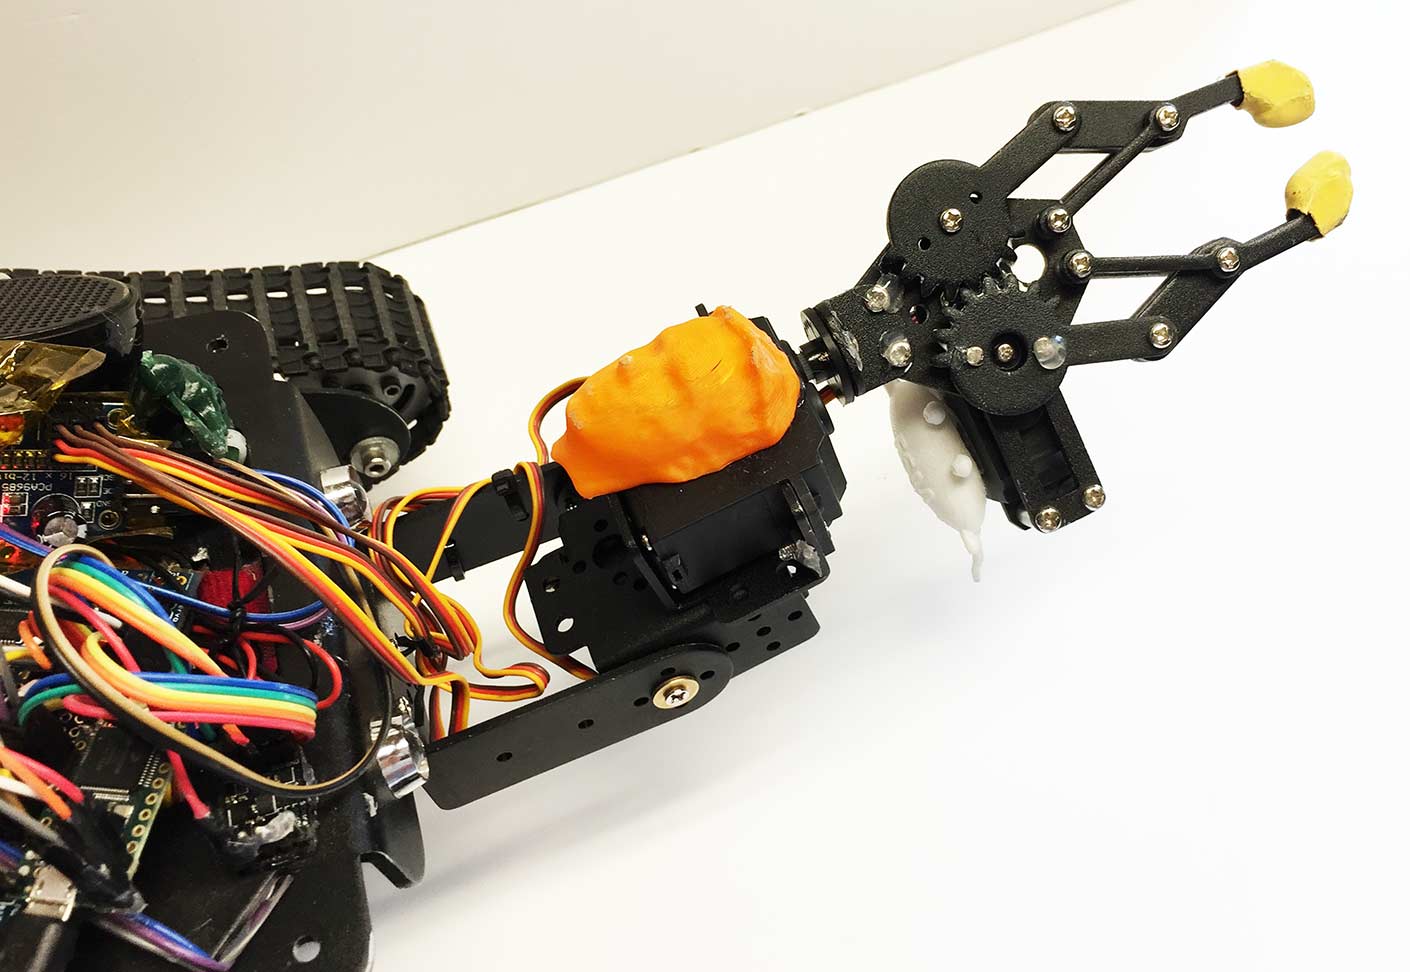
Version 8.5 swapped the gripper servo with a higher torque Lewansoul brand. Up/Down force has been drastically reduced by this mounting style as well so hopefully I won't burn out any more servos for a while.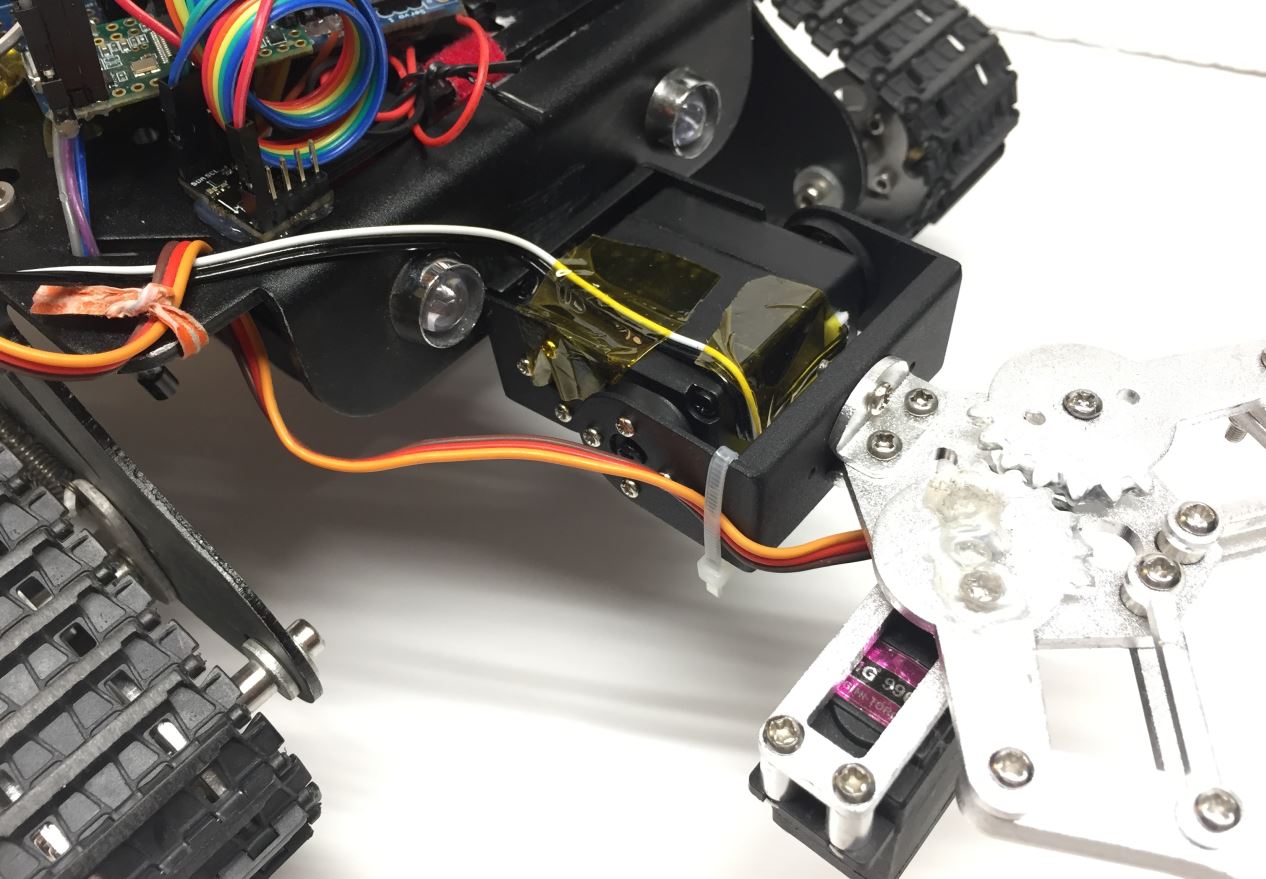
Version 8 added an IMU with sensor fusion. For this the arduino pro mini was swapped for a teensy 3.2.
The Teensy 3.2 was soldered to the proto area on the motor control board. The IMU was carefully hot glued to the chassis with X pointing foward.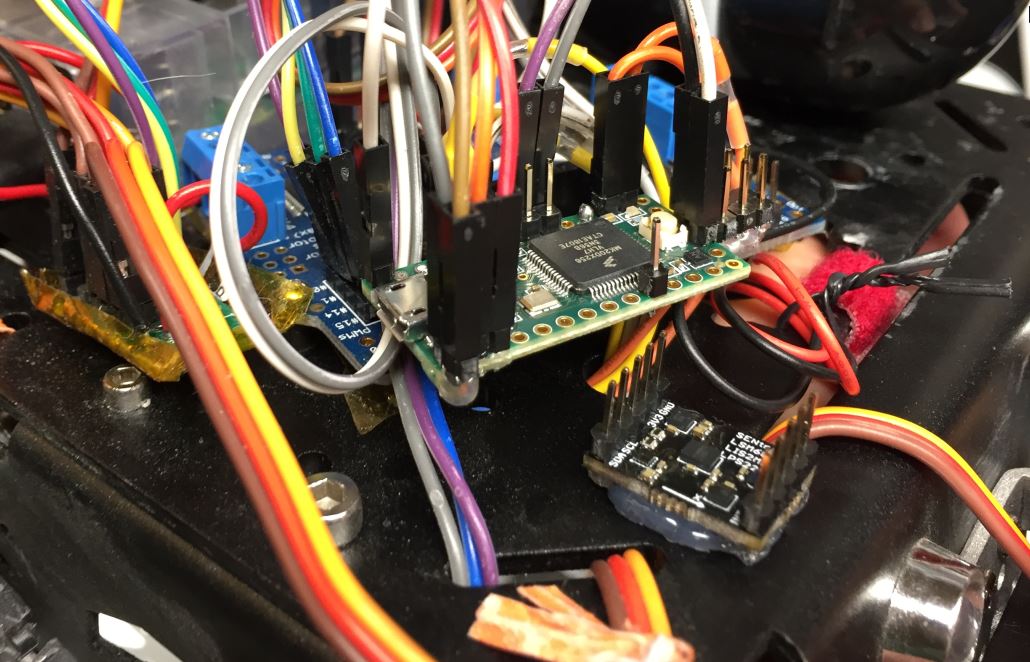
This Sensor Fusion IMU is magical. Combining the EM EM7180 SENtral Motion Coprocessor with 3 dyn-o-mite sensors: ST LSM6DSM iNEMO 6DoF accelerometer & gyroscope sensor, ST LIS2MDL magnetometer and ST LPS22HB barometer
With little to no effort you can get absolute orientation. I use this to display a compass, and detect when the robot has become flipped over.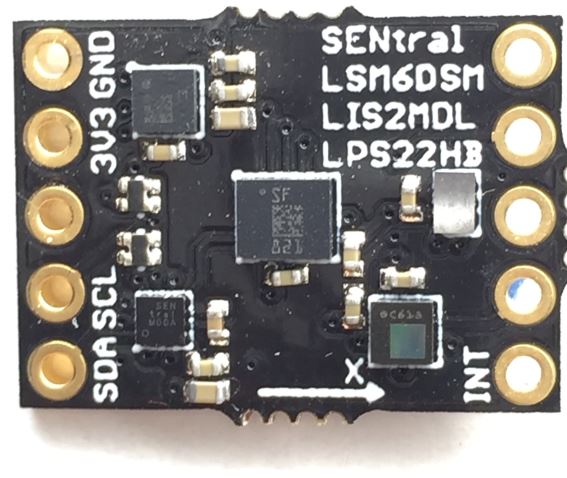
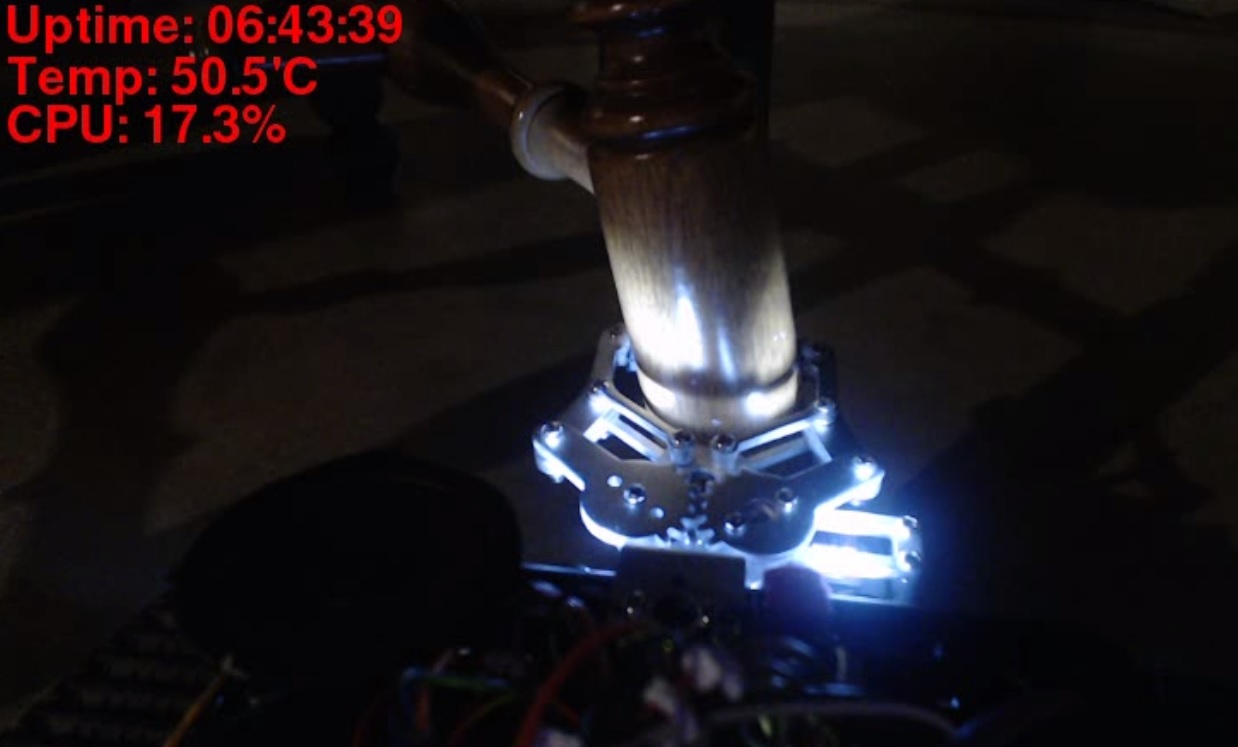
Here is the roll,pitch,yaw and compass outputs on the video HUD overlay.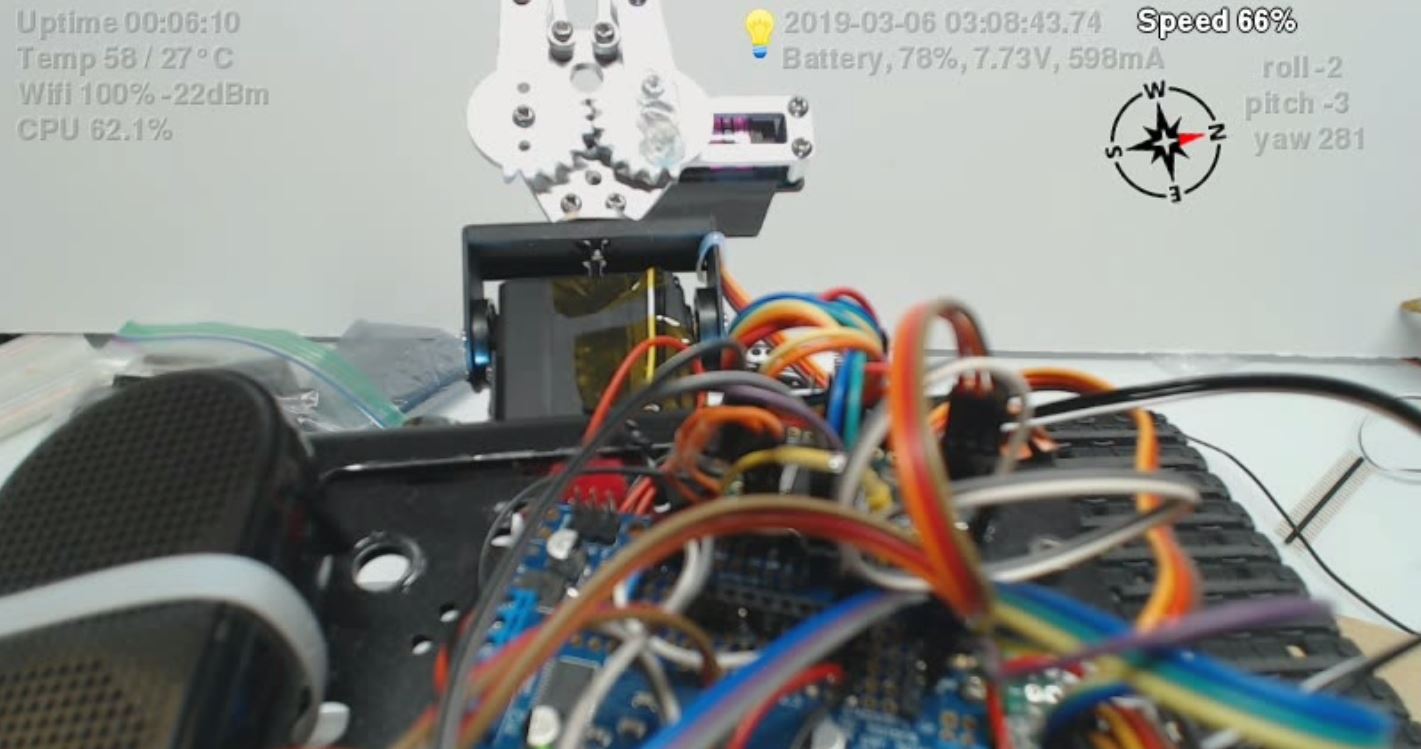
Version 7.5 switched back to USB camera with USB speaker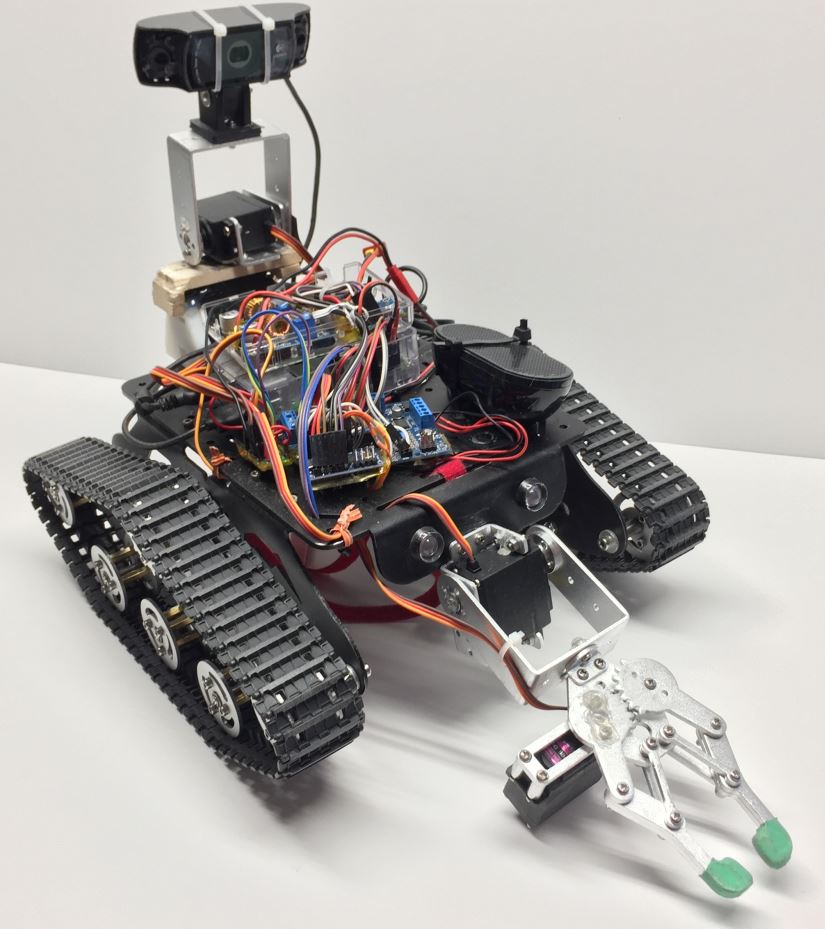
Version 7.5 close up of XL4015 regulators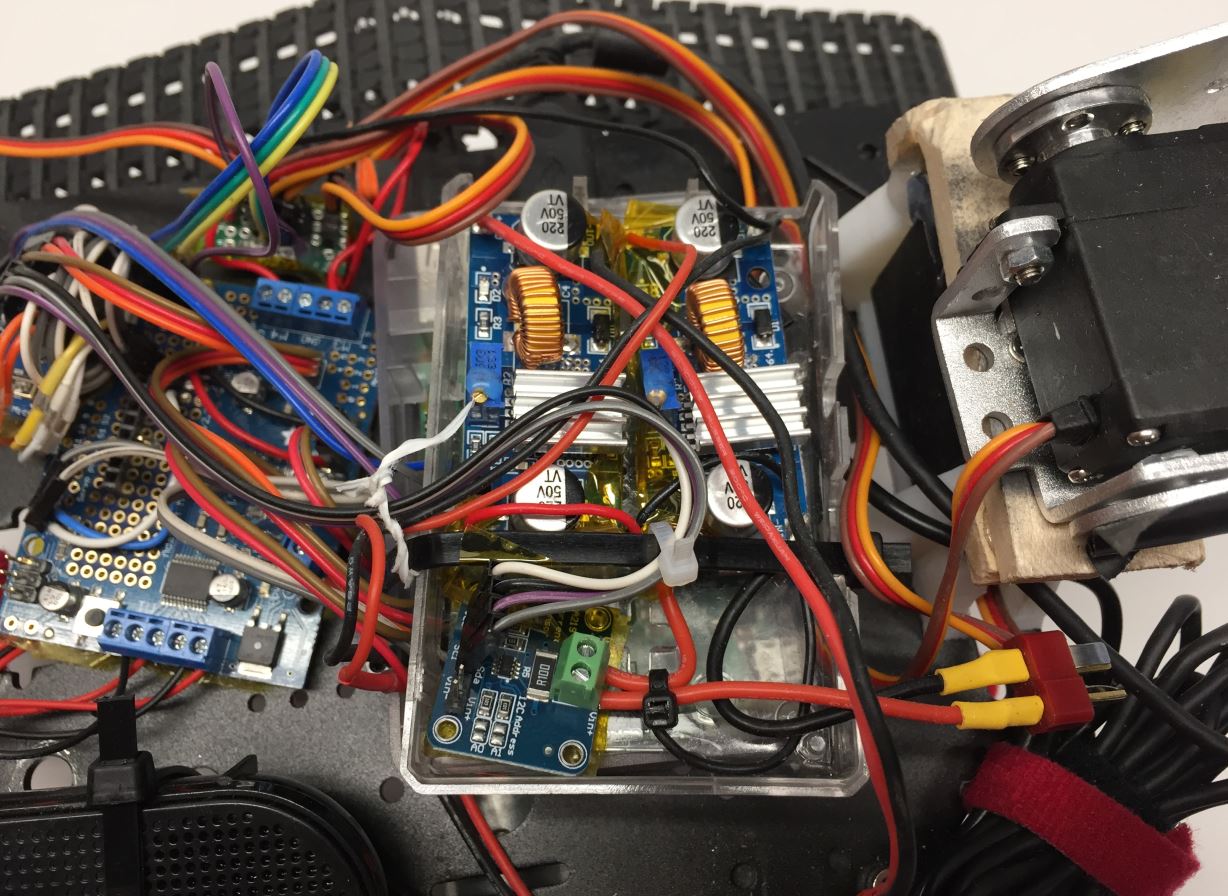
Version 7 of the tank uses a night vision camera and a USB microphone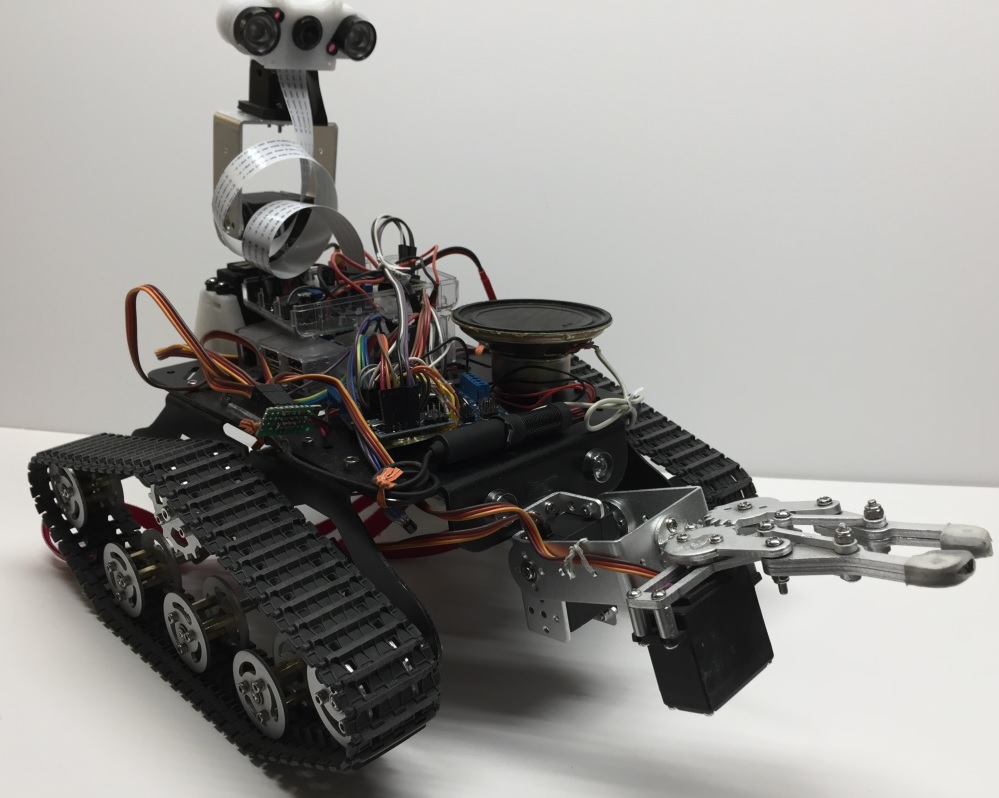
Version 7 top view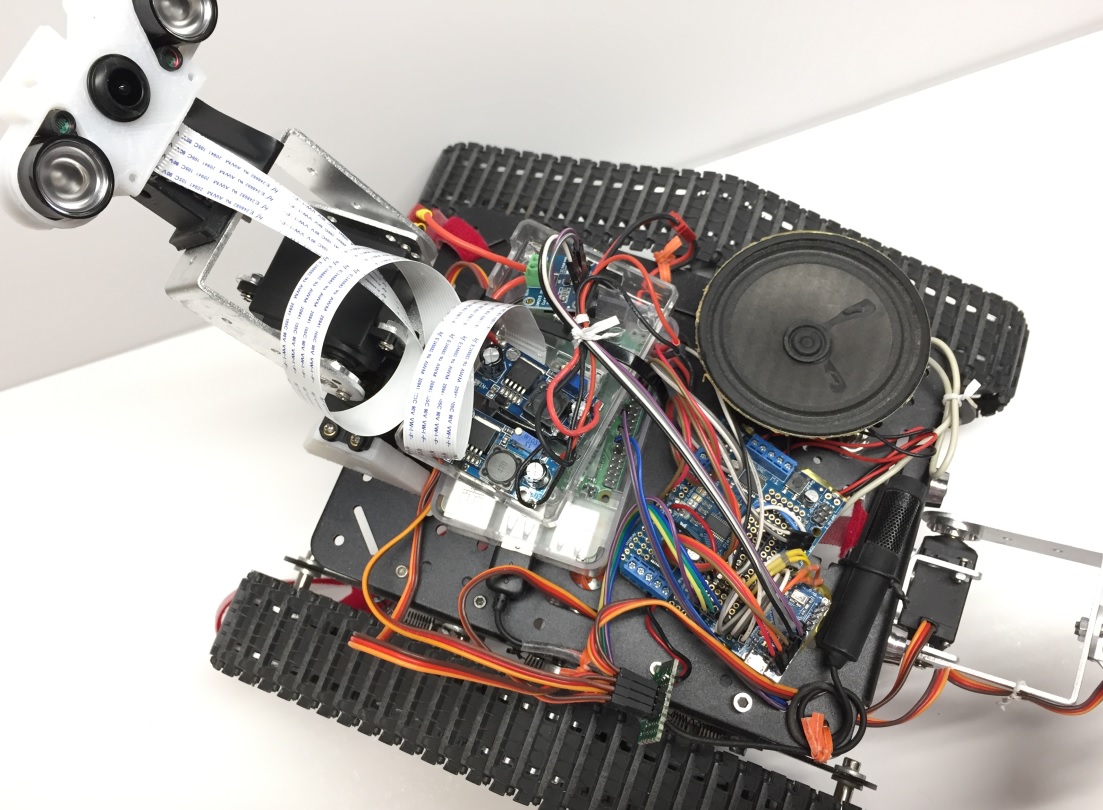
A gripper tilt servo was added to the front of the tank so it can grab more things.
This uses an MG-996 servo. The servo brackets, screws, and bearings all came from a 6-DOF arm kit.
The Camera mounts and gripper were from a 6DOF arm kit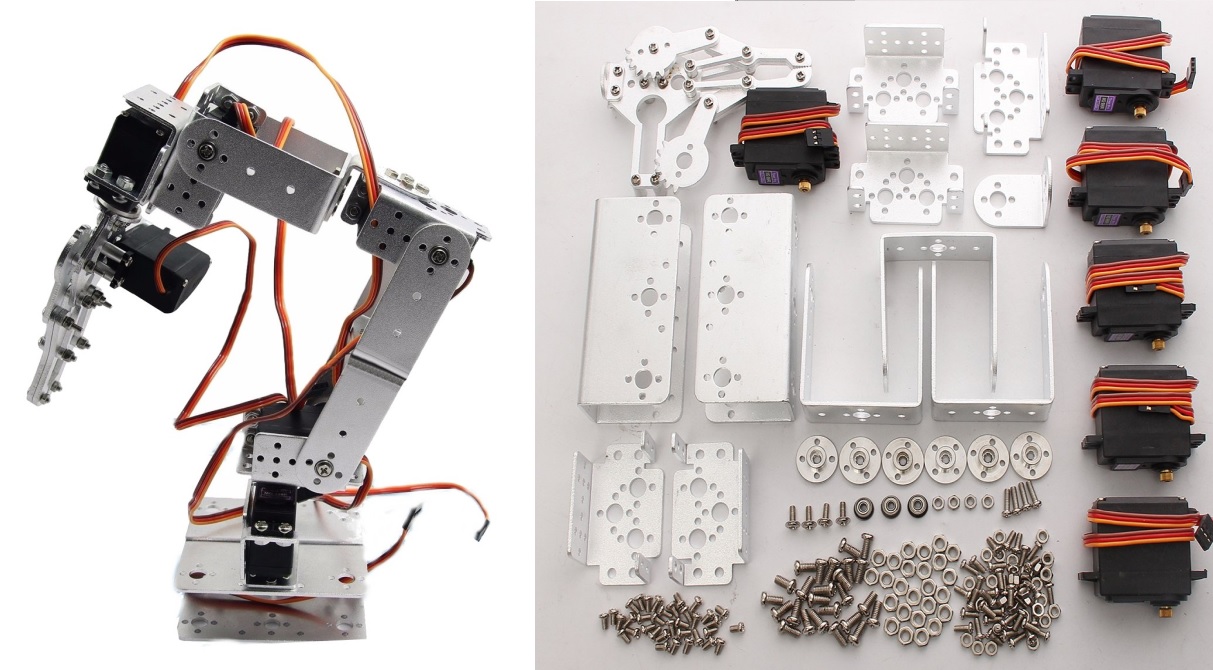
Version 6 of the tank used a logitech C920 for camera and microphone. V6 added current monitoring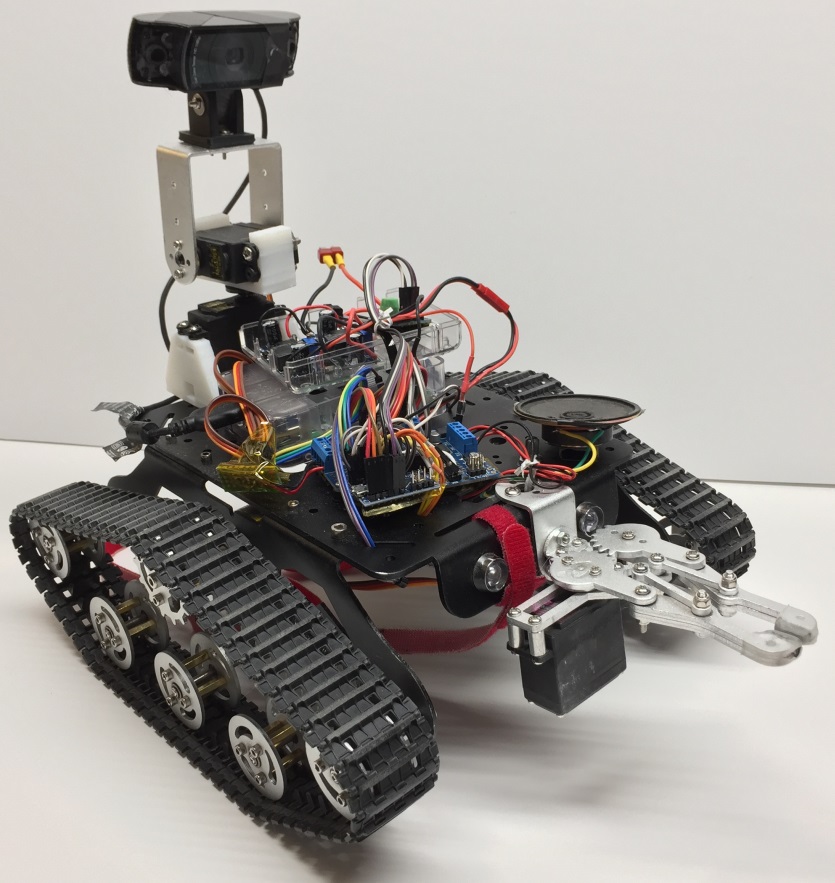
After 50,000 battery measurements from one session I captured the full LIPO discharge curve. The BMS cuts out at 6v.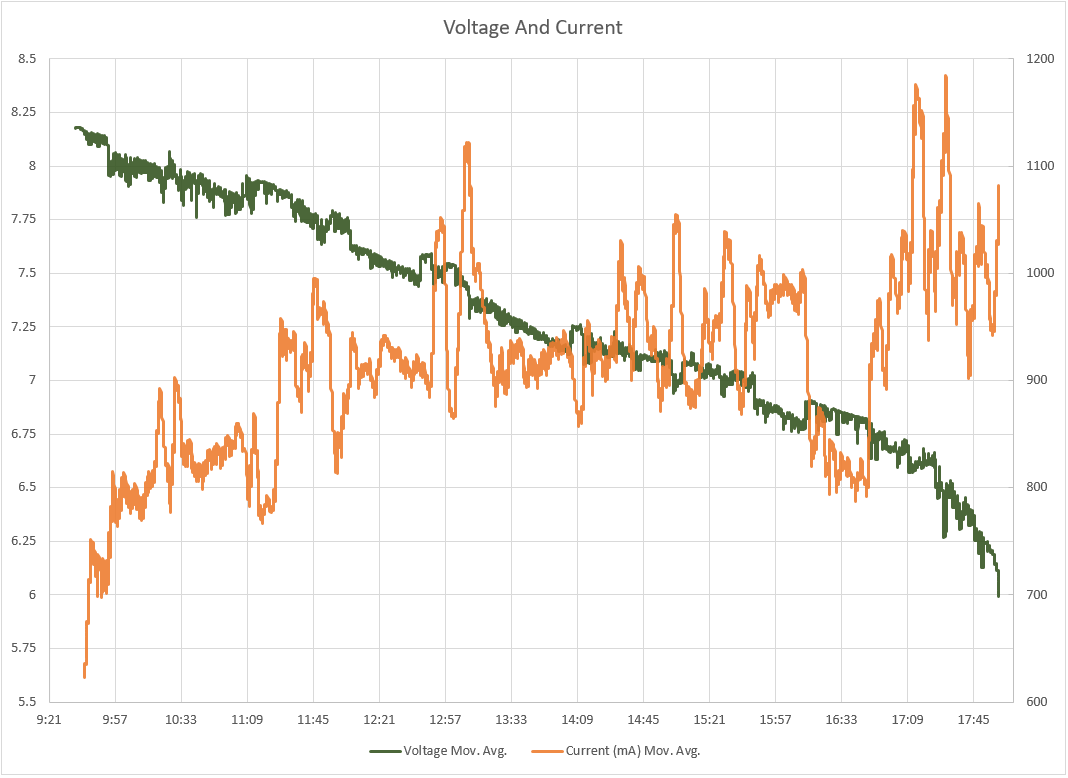
Arduino in font, Raspberry pi in the rear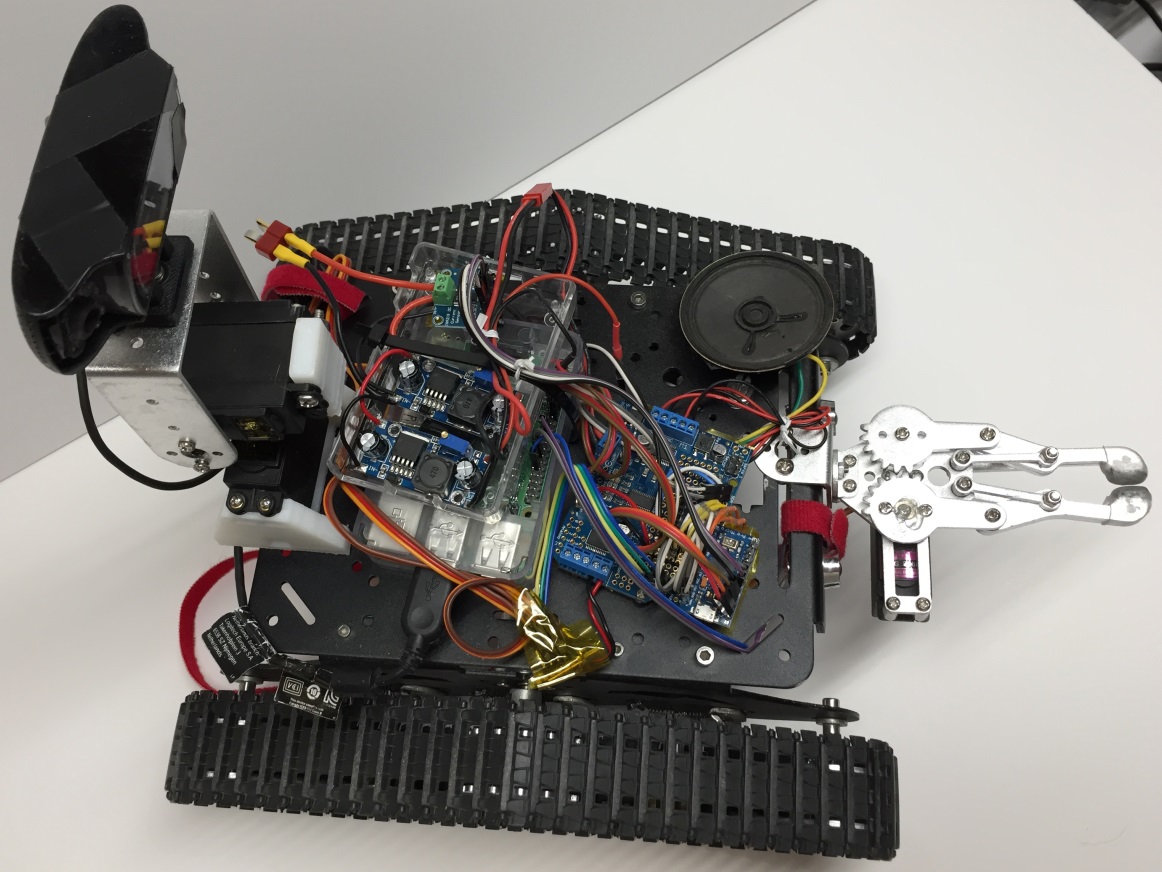
The robot can unflip itself using the camera tilt servo:
I added an arduino to read the hall sensors on the motors. The arduino reads a GPIO pin to find edge transitions and calculate motor RPM based on the 75:1 gear ratio
Here you can see blue tape on the magnetic encoder which spins past the hall sensor.
This is a 9V DC 150 RPM motor. Model GM25 370 75:1 geared motor with 2 hall sensors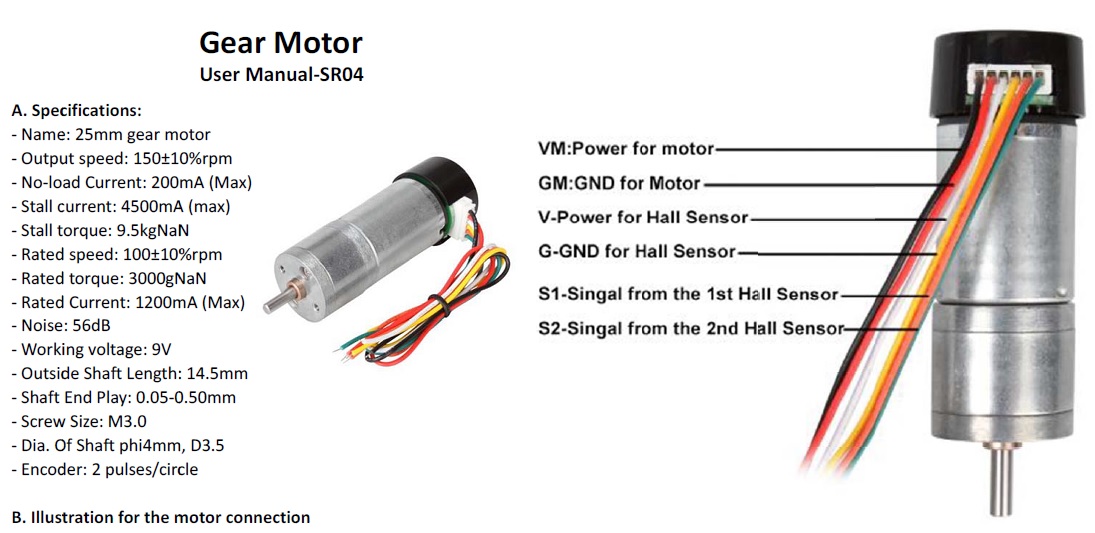
Headlights are connect from GPIO to an NPN transistor and the 3v lines on the pi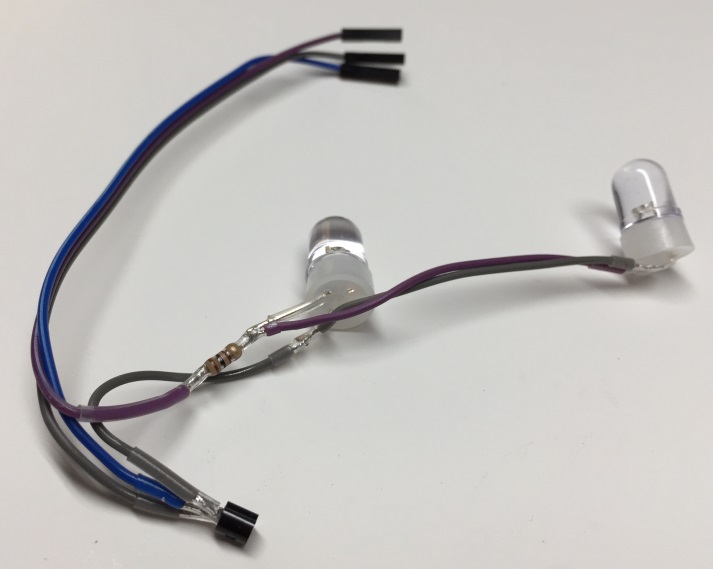
V3 robot obtained a gripper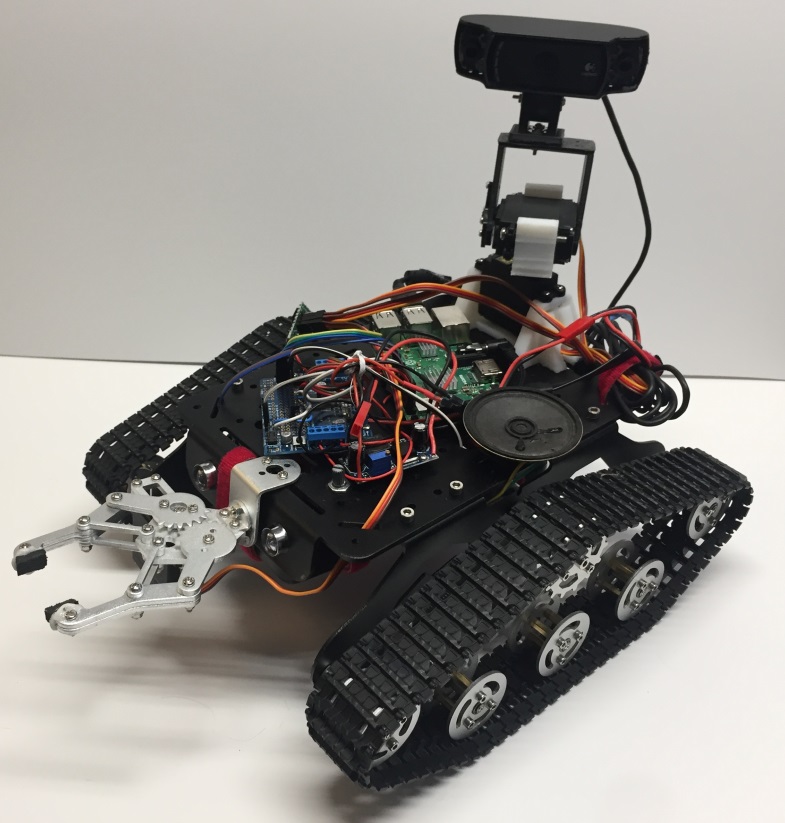
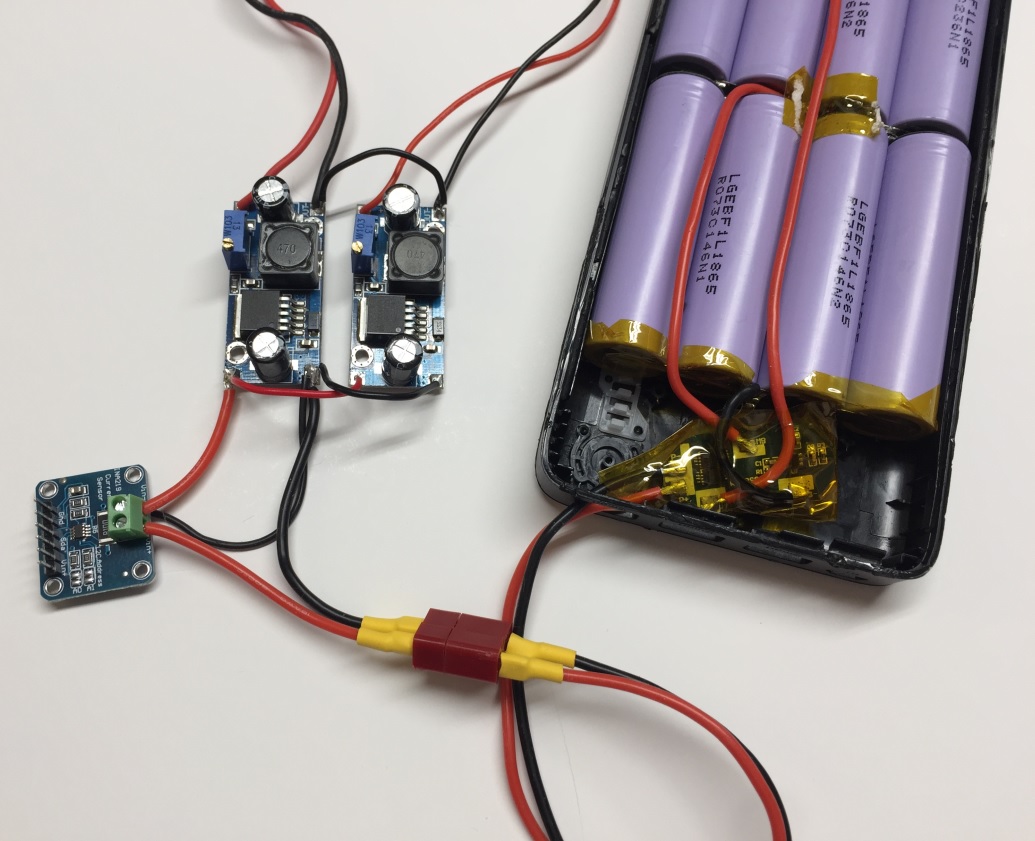
V4 top - 2x 5v regulator for RC Battery Style 2
V4 underside - Battery "Style 2" - 78Wh / 2x 5,200mah RC Batteries in Parallel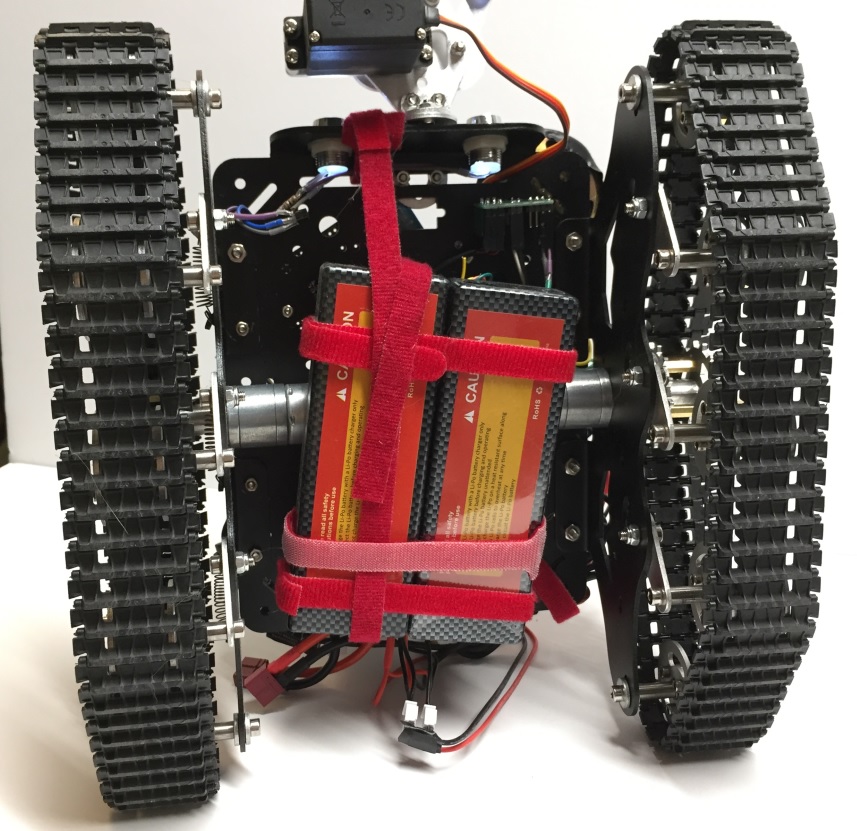
V3 underside - Battery "Style 1" - USB 99 Wh / 26,800 mAh battery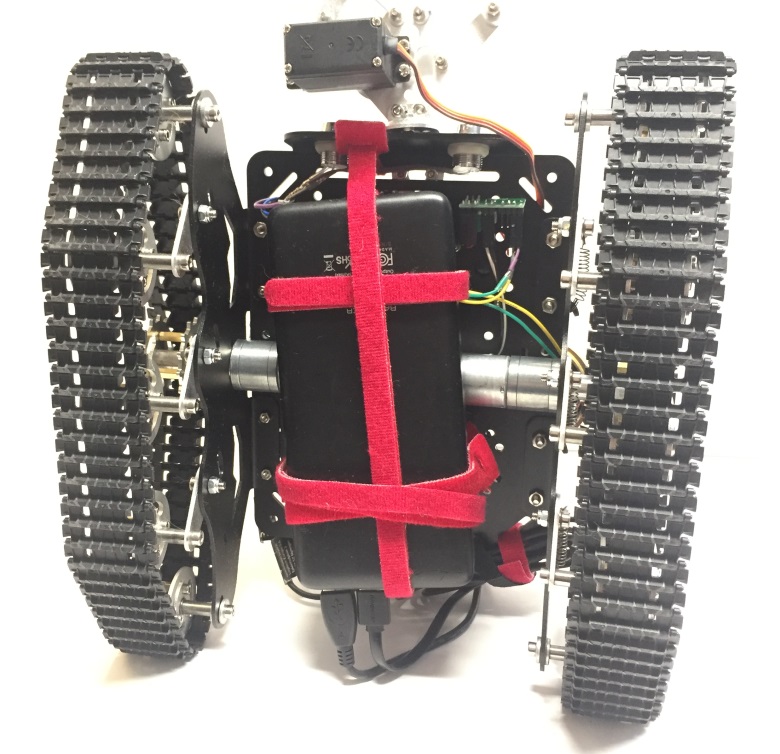
V3 battery pack connections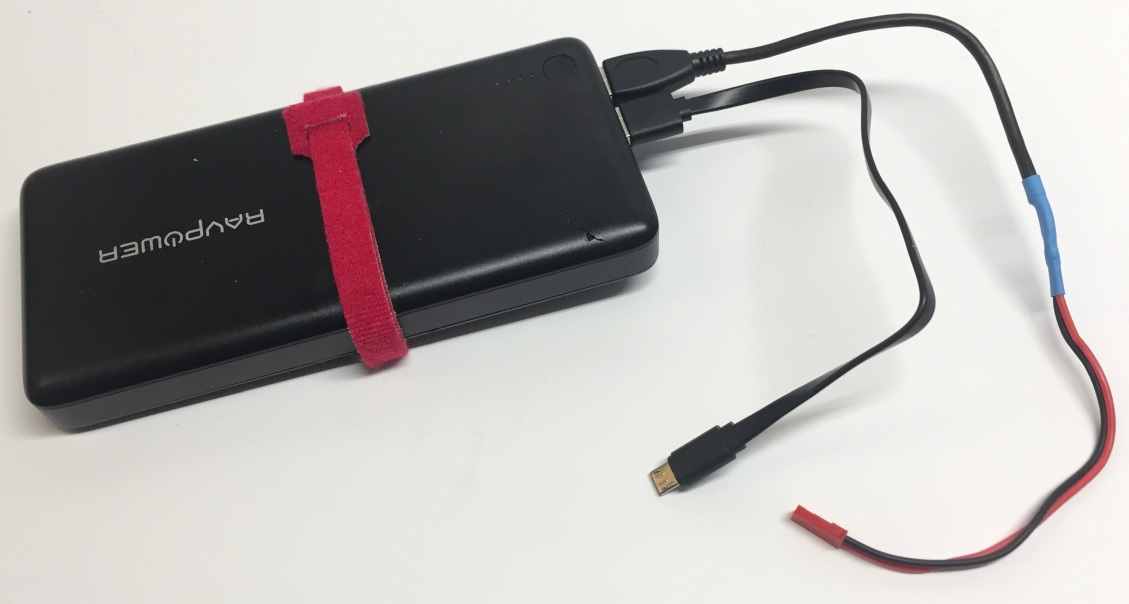
I bought another RavPower battery pack, but it did not work the same and it did not stay powered on. The over current protection circuit cut off the power output.
Breaking open the battery pack allows maximum flexibility. I rewired it from an 8P setup to 4P2S to provide 7.4v just like the RC battery setup.
V6 Battery with 4A BMS Protection and voltage & current mononitoring via INA219 sensor. Now I can show Battery Level % on the vidoe HUD.
99 Wh / 26,800 mAh via 8x 18650 cells
I switched switching regulator from the LM2596 to XL4015. This increased efficiency by around 20%.
Hot glue is used to keep the voltage adjustment in place.
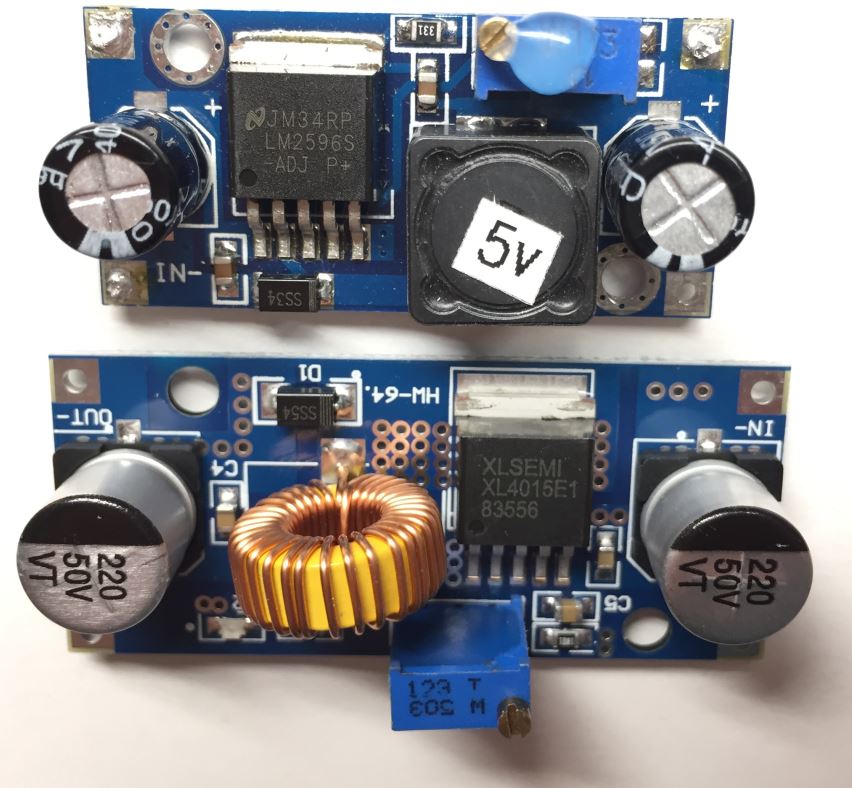
2S Lipo 7.4v outputting 5v is 77% vs 93% efficiency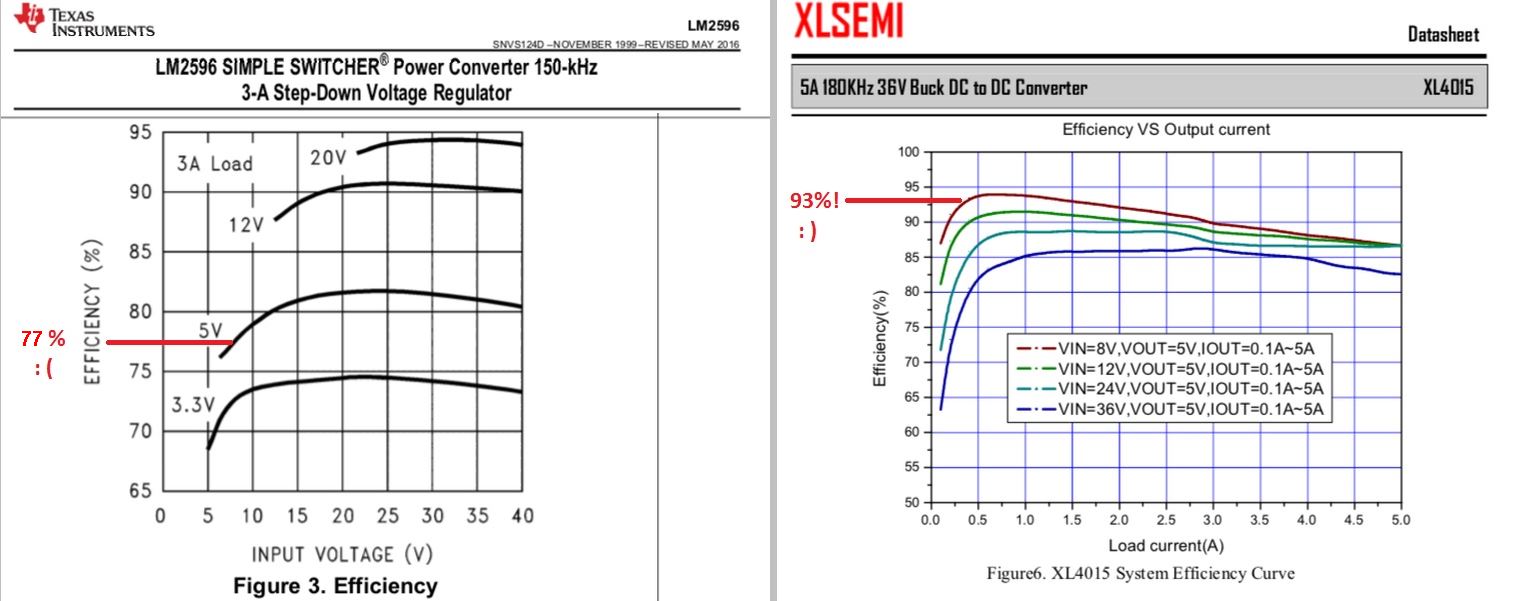
I recharge at 3A and it takes 320 minutes (5 hours 20 minutes)
After BMS cutting off at 6v the battery charges 13,159 mAh @ 7.4v = 97,376.6 Wh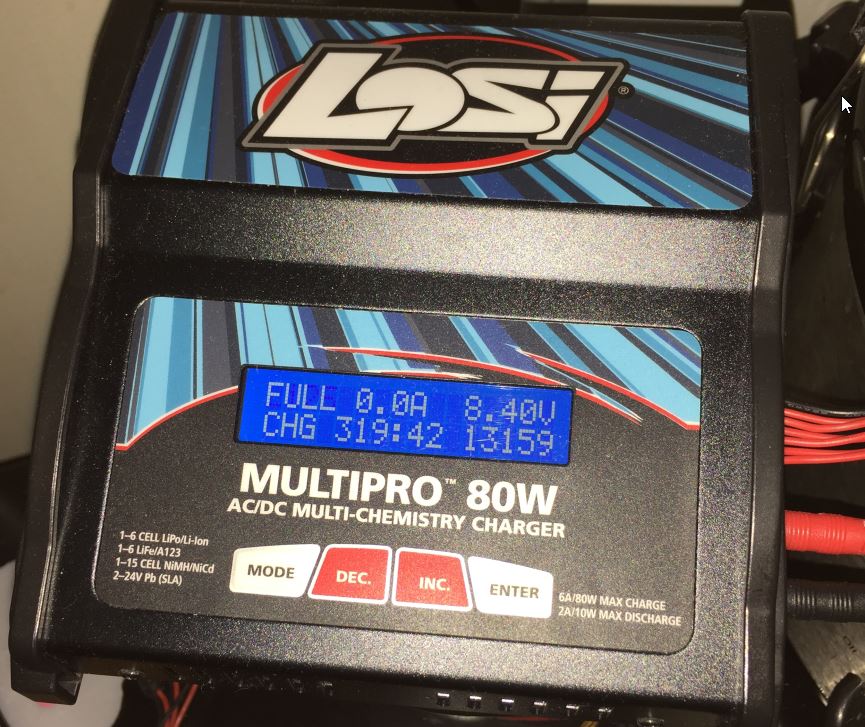
V3 gripper with neoprene pads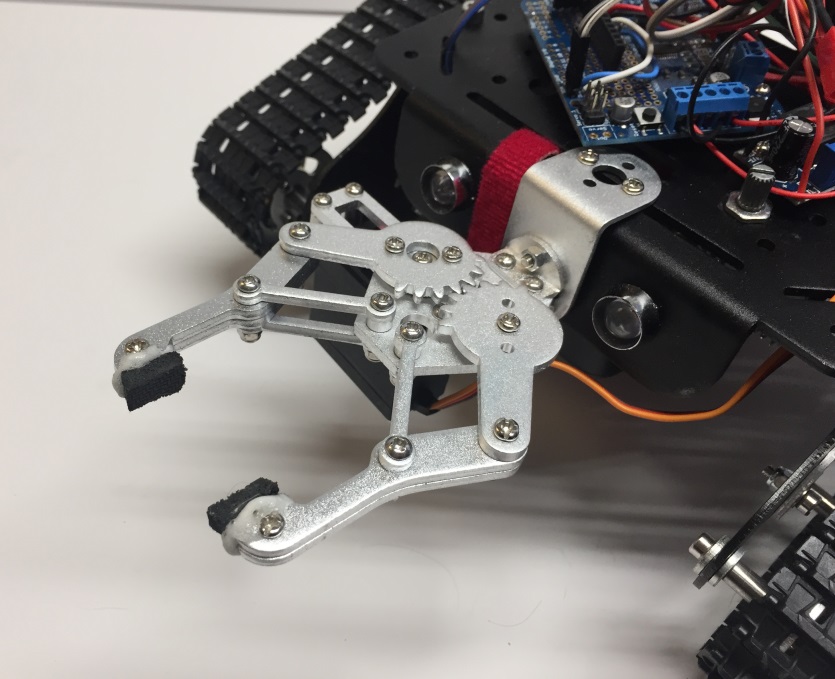
Battery Style Runtime Comparison
Style 1 - USB Battery
26,800 mAh @ 5v = 99.2 Wh
15 Hours 12 Minutes
Style 2 - 2x RC Car Batteries
2x 5200 mAh @ 7.4v = 77.6 Wh
11 Hours 29 Minutes

After further power optimizations - my current runtime record is 20 hours 13 minutes:
Notice the higher CPU usage in the following screenshot. I lowered the clock to 900mhz to improve power efficiency

V2 got everything screwed in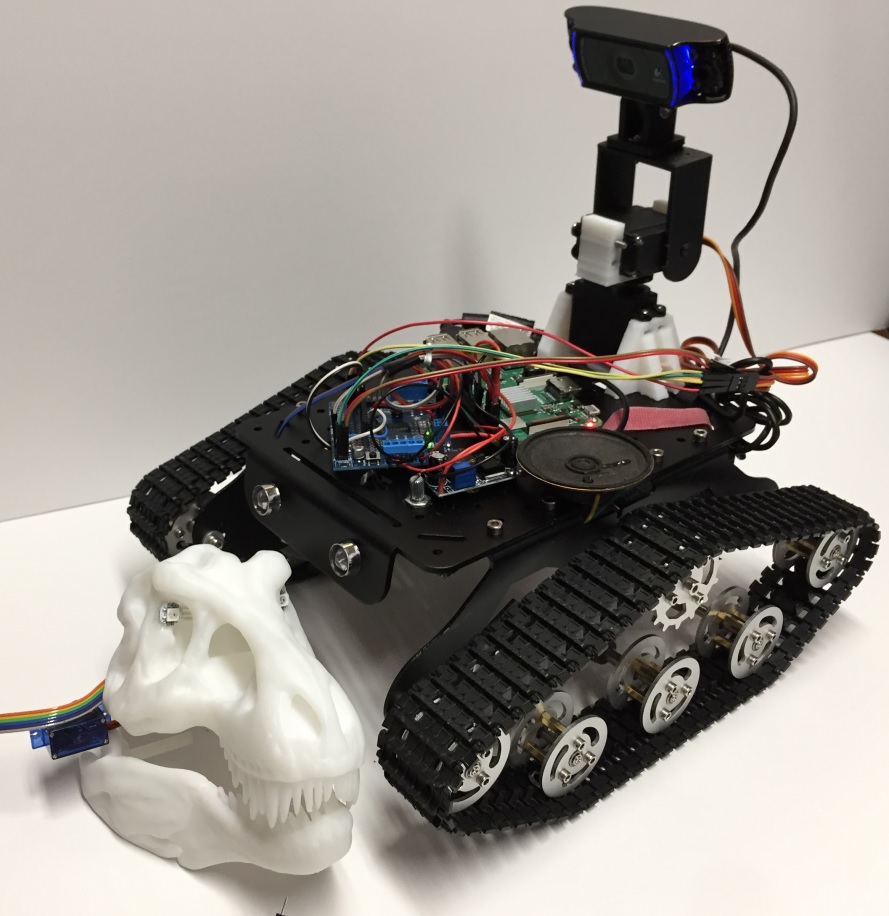
V2 top close up
V2 Components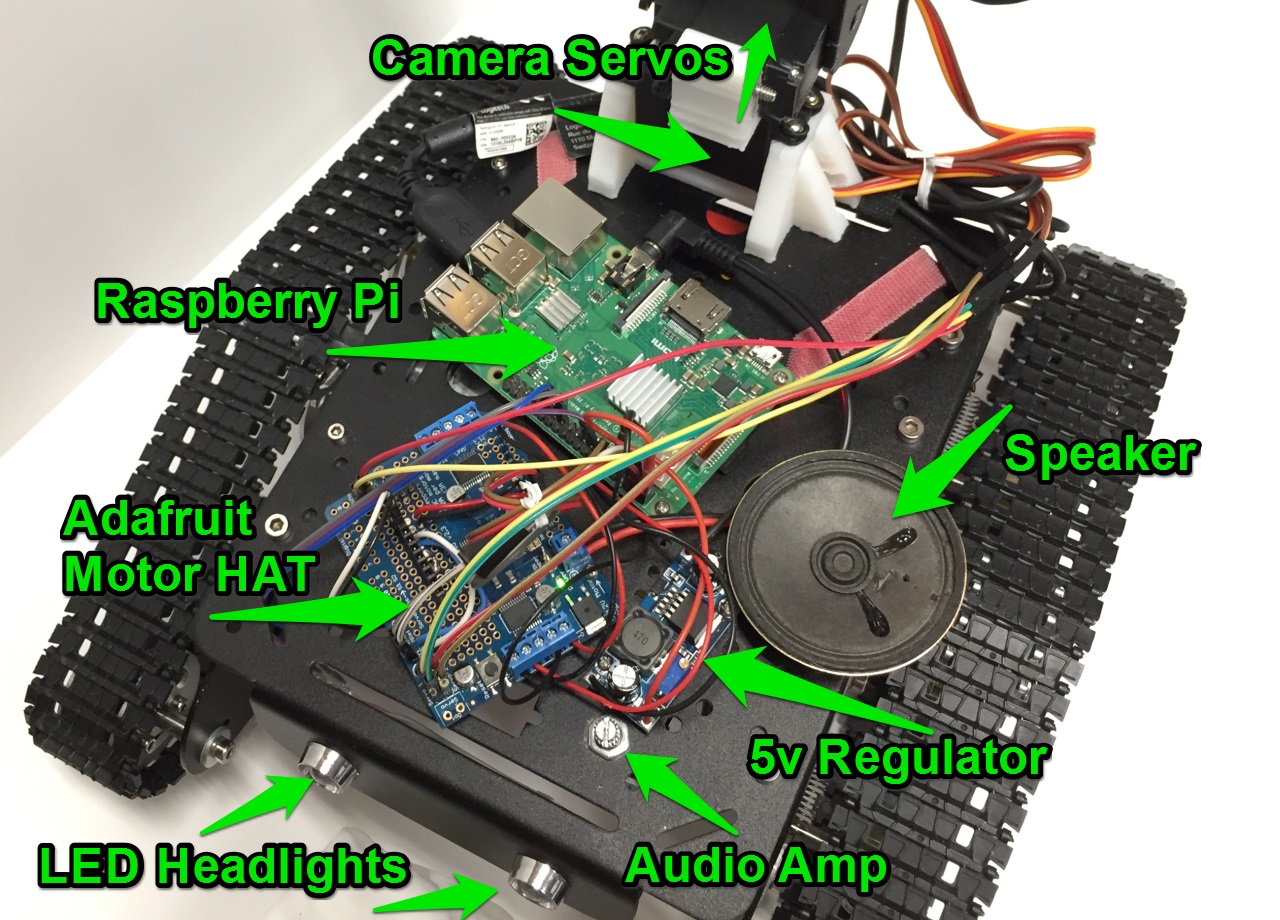
The LED headlights are connected via a 100 ohm resistor and NPN transistor. This connects to the 3v power rail on the raspberry pi and a GPIO pin for control.
V2 Underside Single Battery Config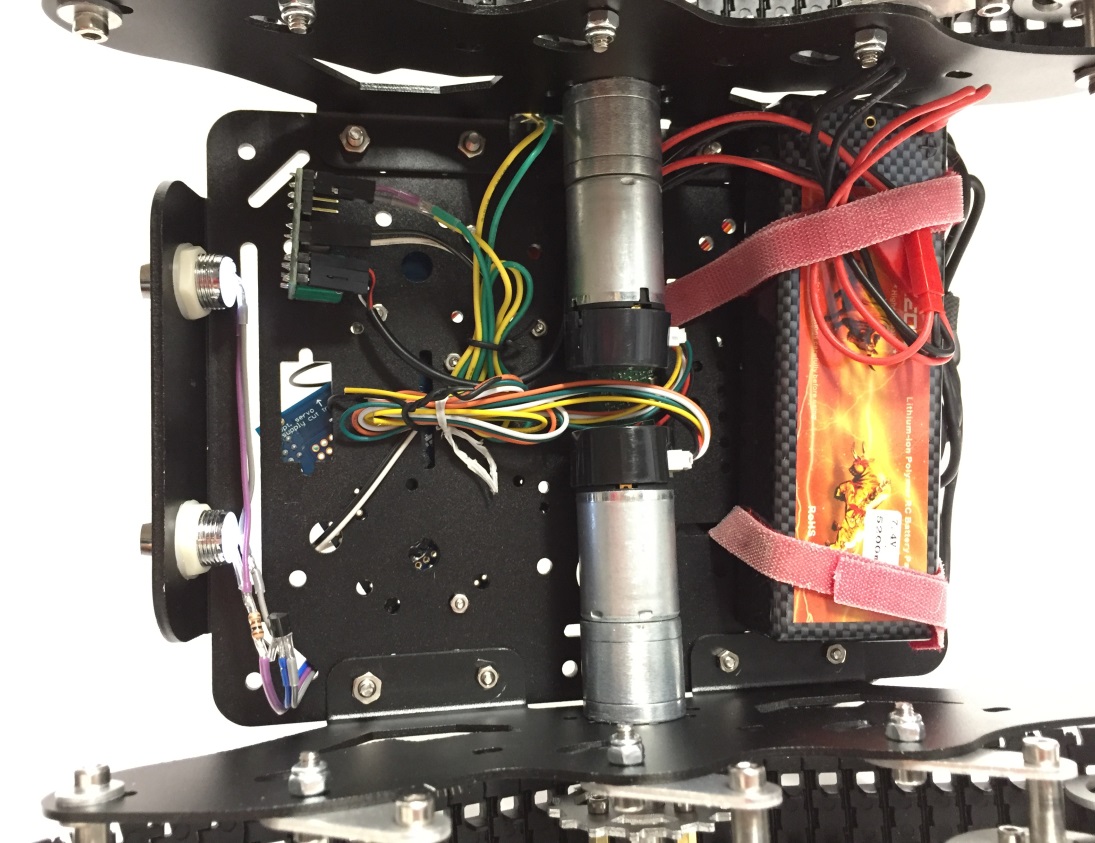
V1 was pretty rough
V1 had had night vision for a bit
Scissors were fun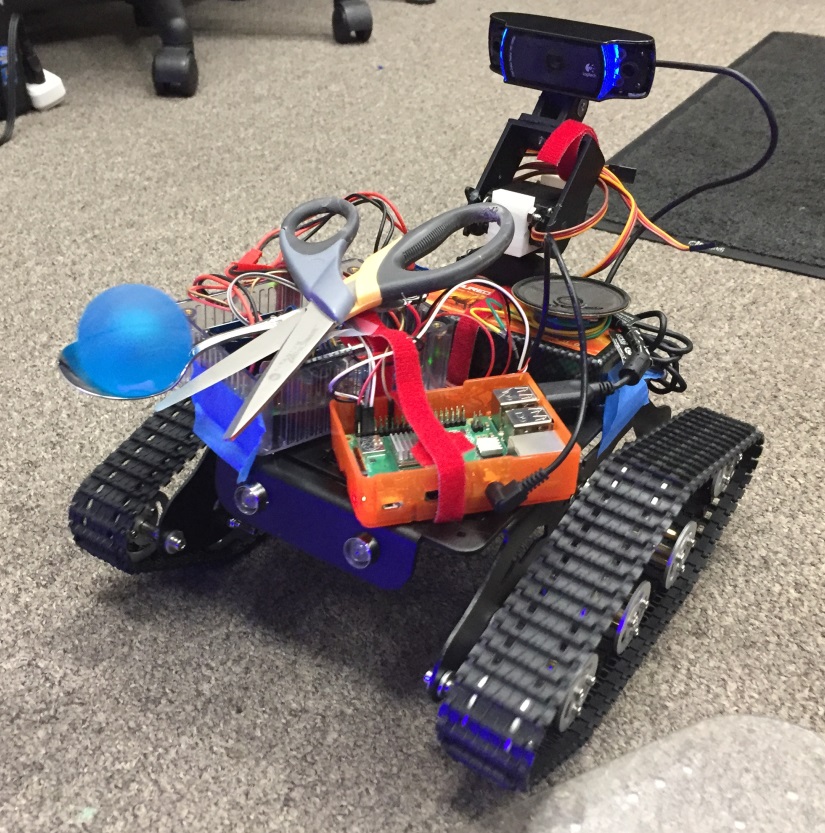
Controls on Lets Robot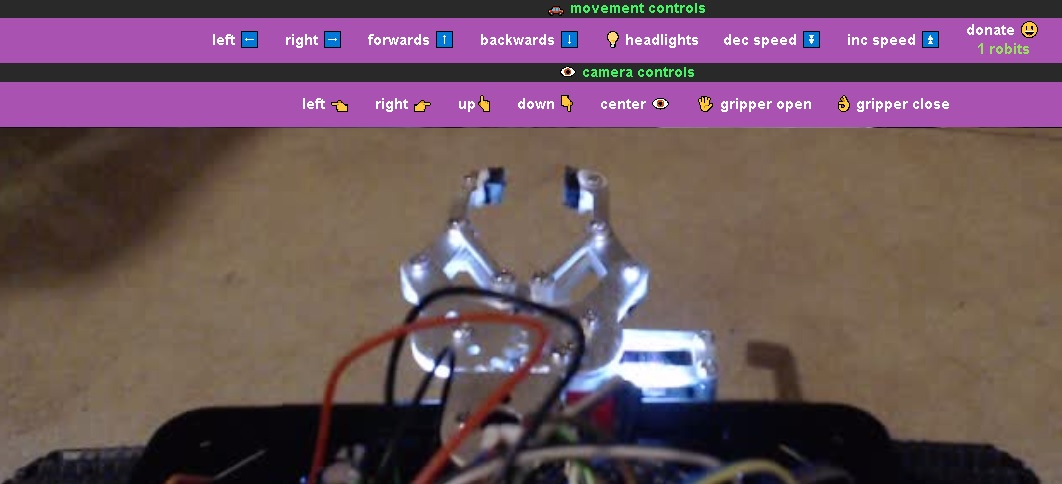
The end of the gripper kept getting caught on things. Removing the screws on the end helped significantly.
gripper screws 1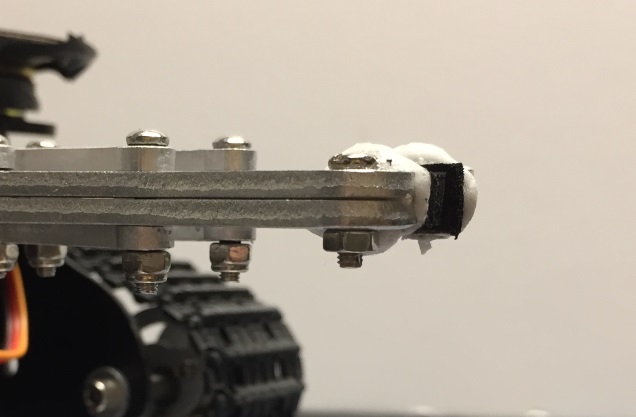
gripper screws 2
I was attaching neoprene pads cut off from a mouse pad to allow more grip, but they needed to be replaced every day or two. Covering with heat shrink eliminated that problem
gripper covers heat shrink 1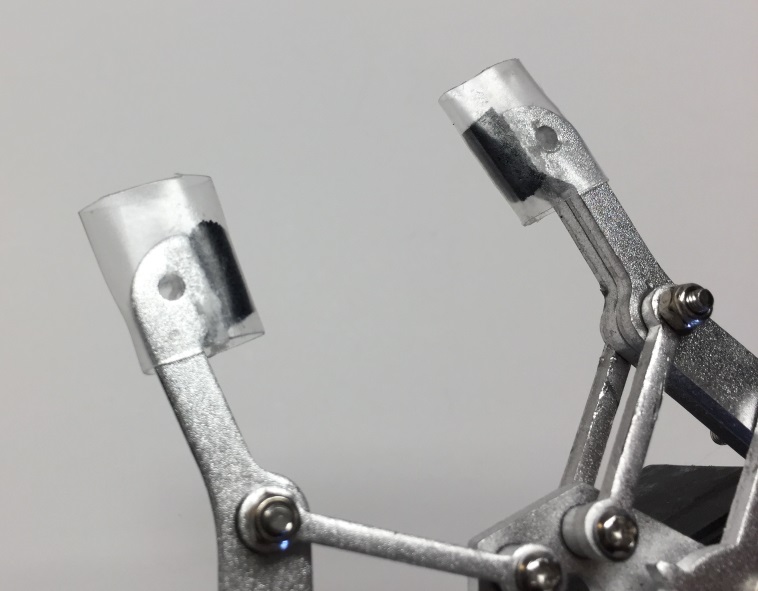
gripper covers heat shrink 2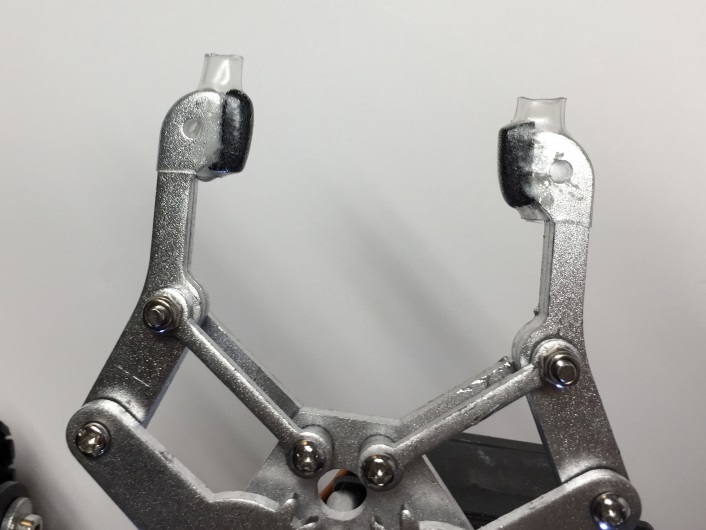
gripper covers heat shrink 3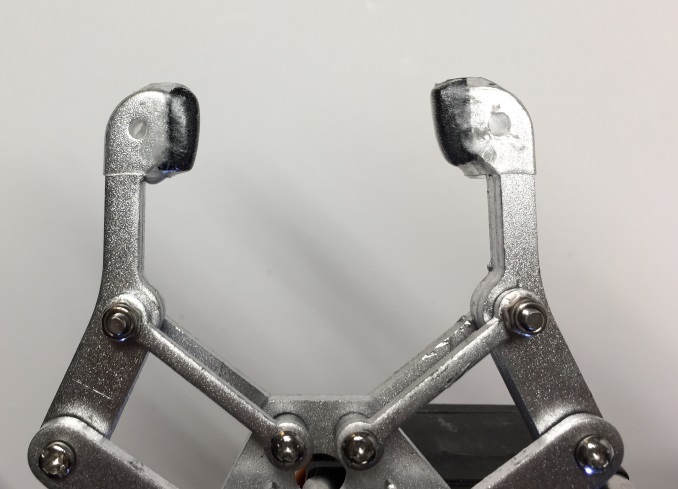
The tank was pulling to the left pretty hard. Swapping the 75:1 gearbox from a similar wild thumper motor fixed the issue.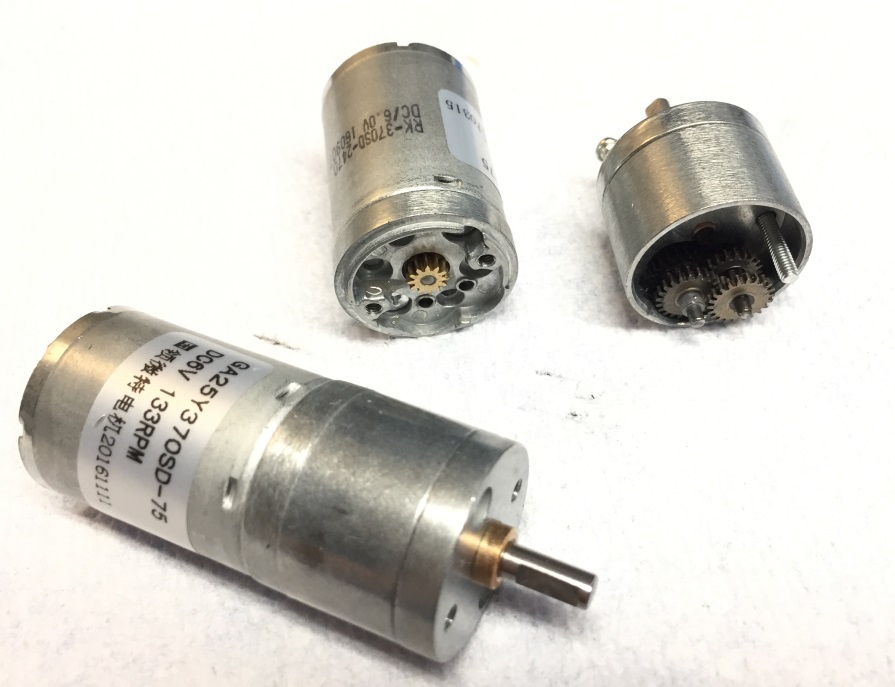
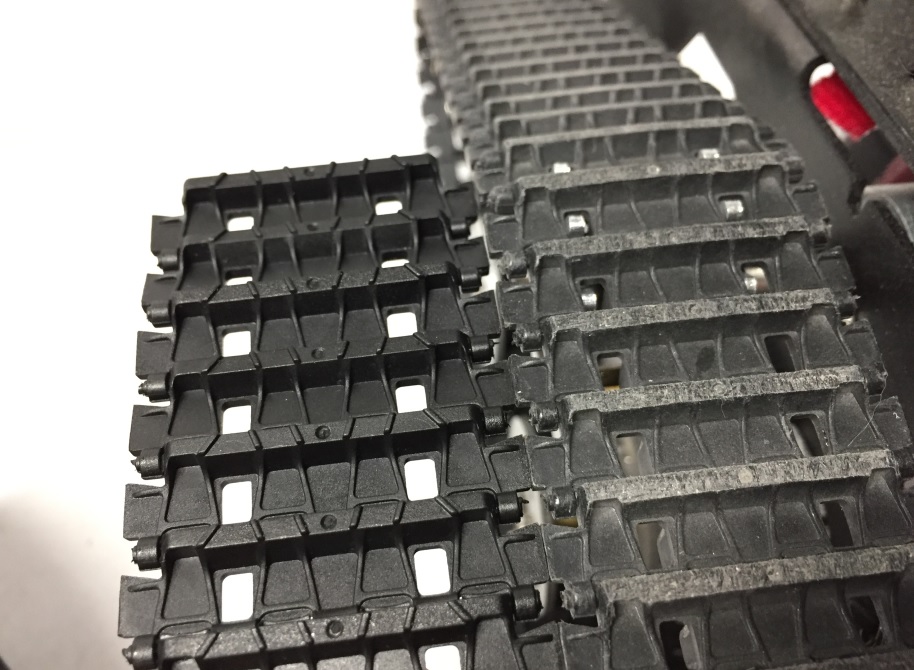
The treads are wearing down froms spinning against the concrete floor constantly
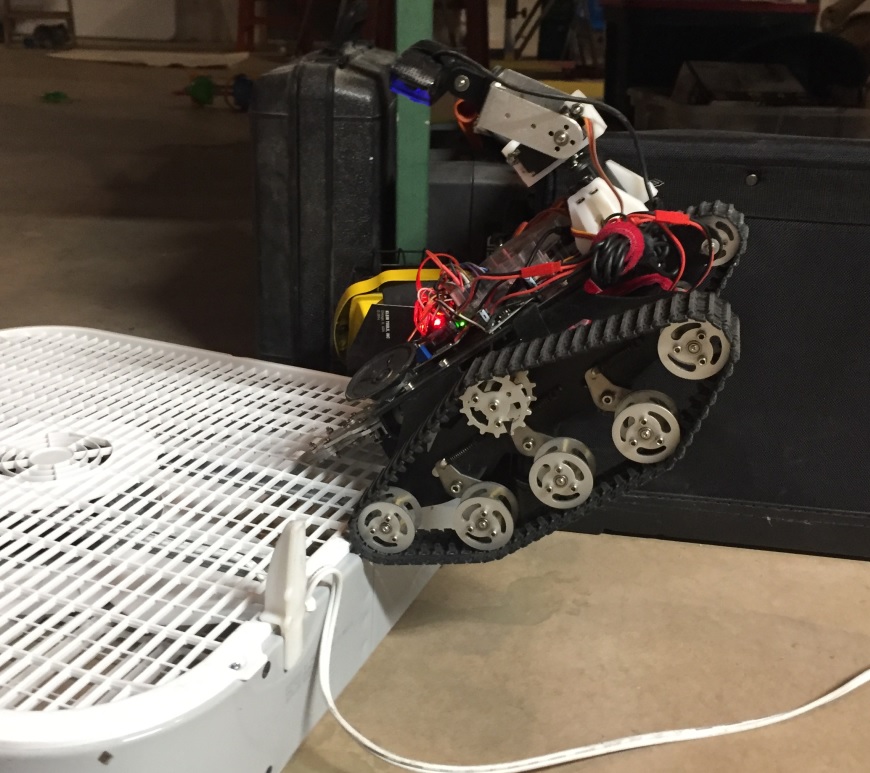
The internet drivers get the tank into lots of shenanigans
Doll Hair doesn't play well with spinning things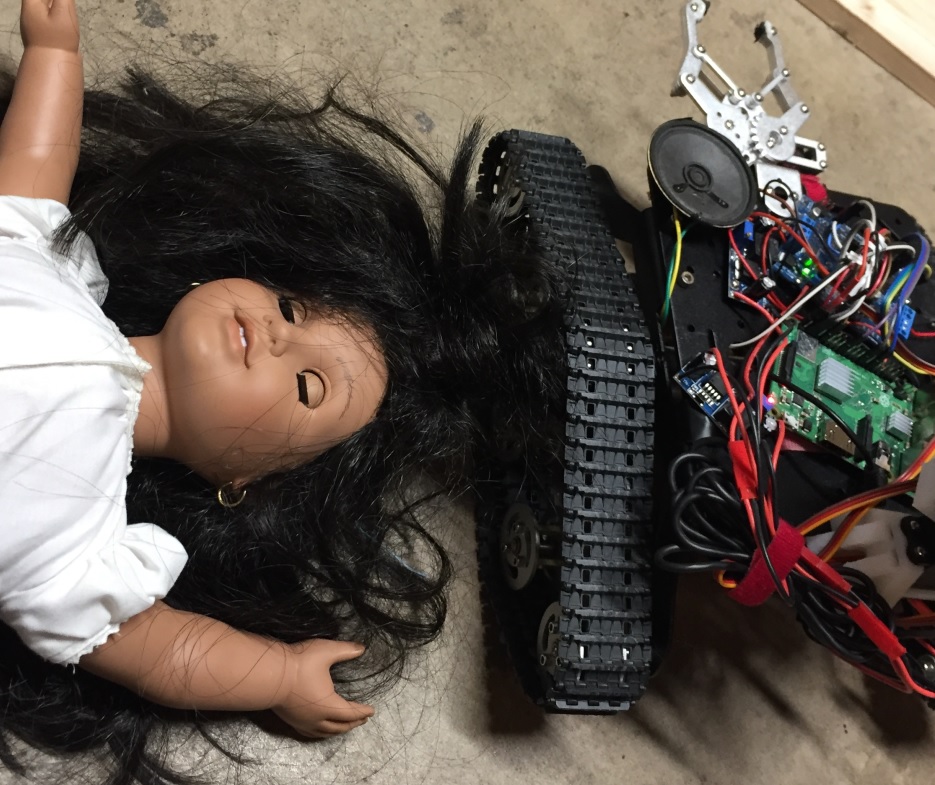
Doll Hair Untangling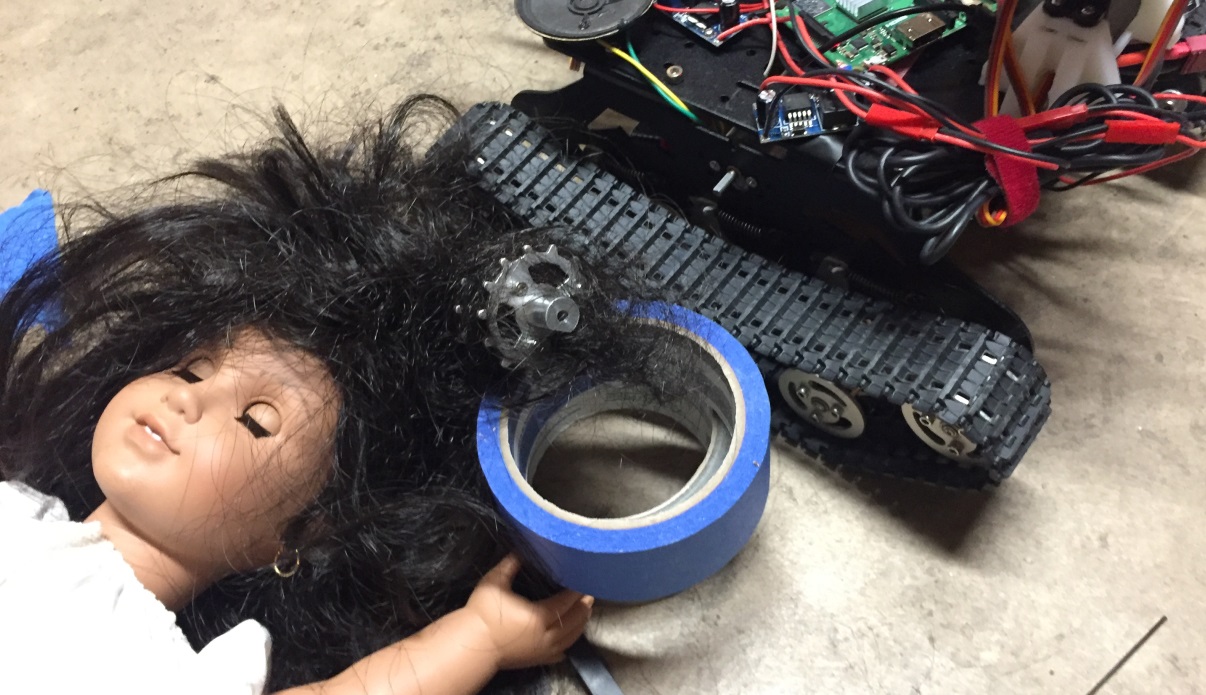
V5 the weak 3d printed camera braket broke after a few days of abuse by random internet drivers
V5 the new aluminum bracket uses a proper ball bearing so should last a while

The gripper servo horn came unscrewed from the constant vibration. I didn't use thread locker and it hasn't happened again, but if it does, threadlocker is the answer.
Stuck in a fan
This chair leg is wide enough to get the gripper around but you cannot get back out!
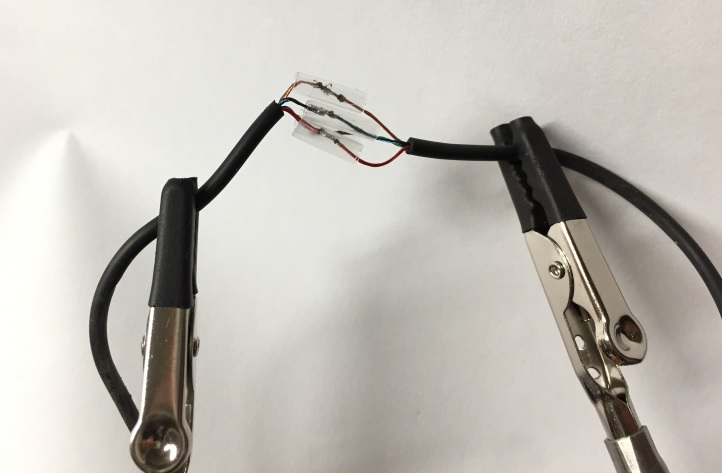
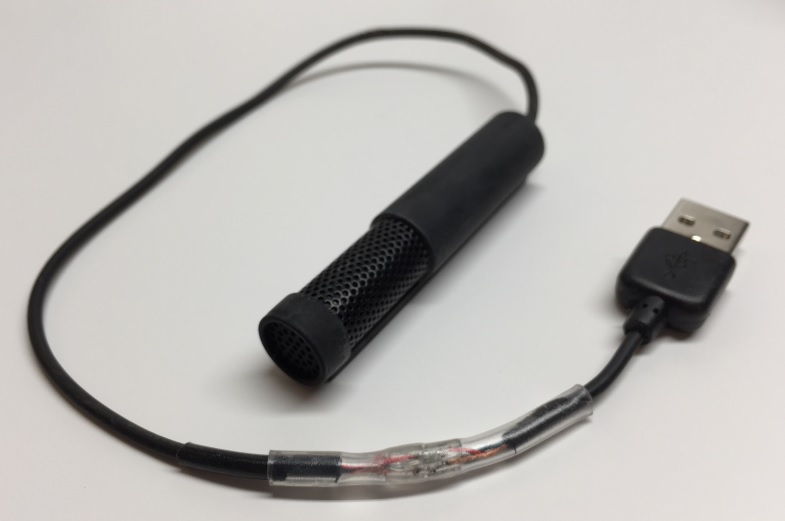
After 1 day the USB microphone got caught on something and wrapped around the treads and shredded
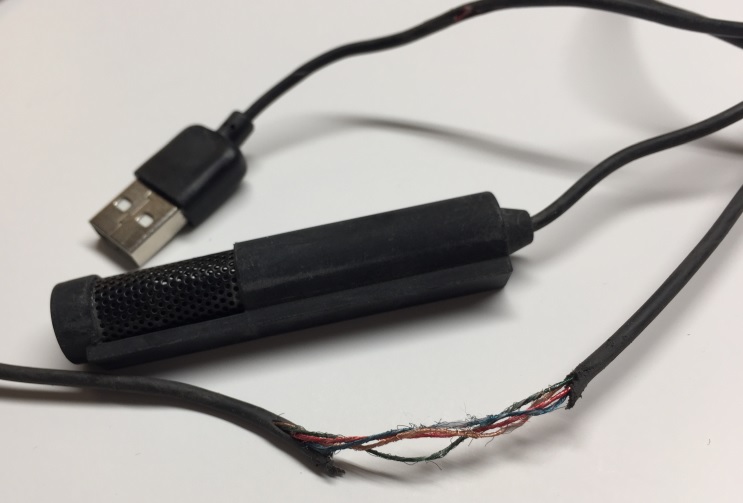
This was probably a good thing - after the repair it had a nice short cable
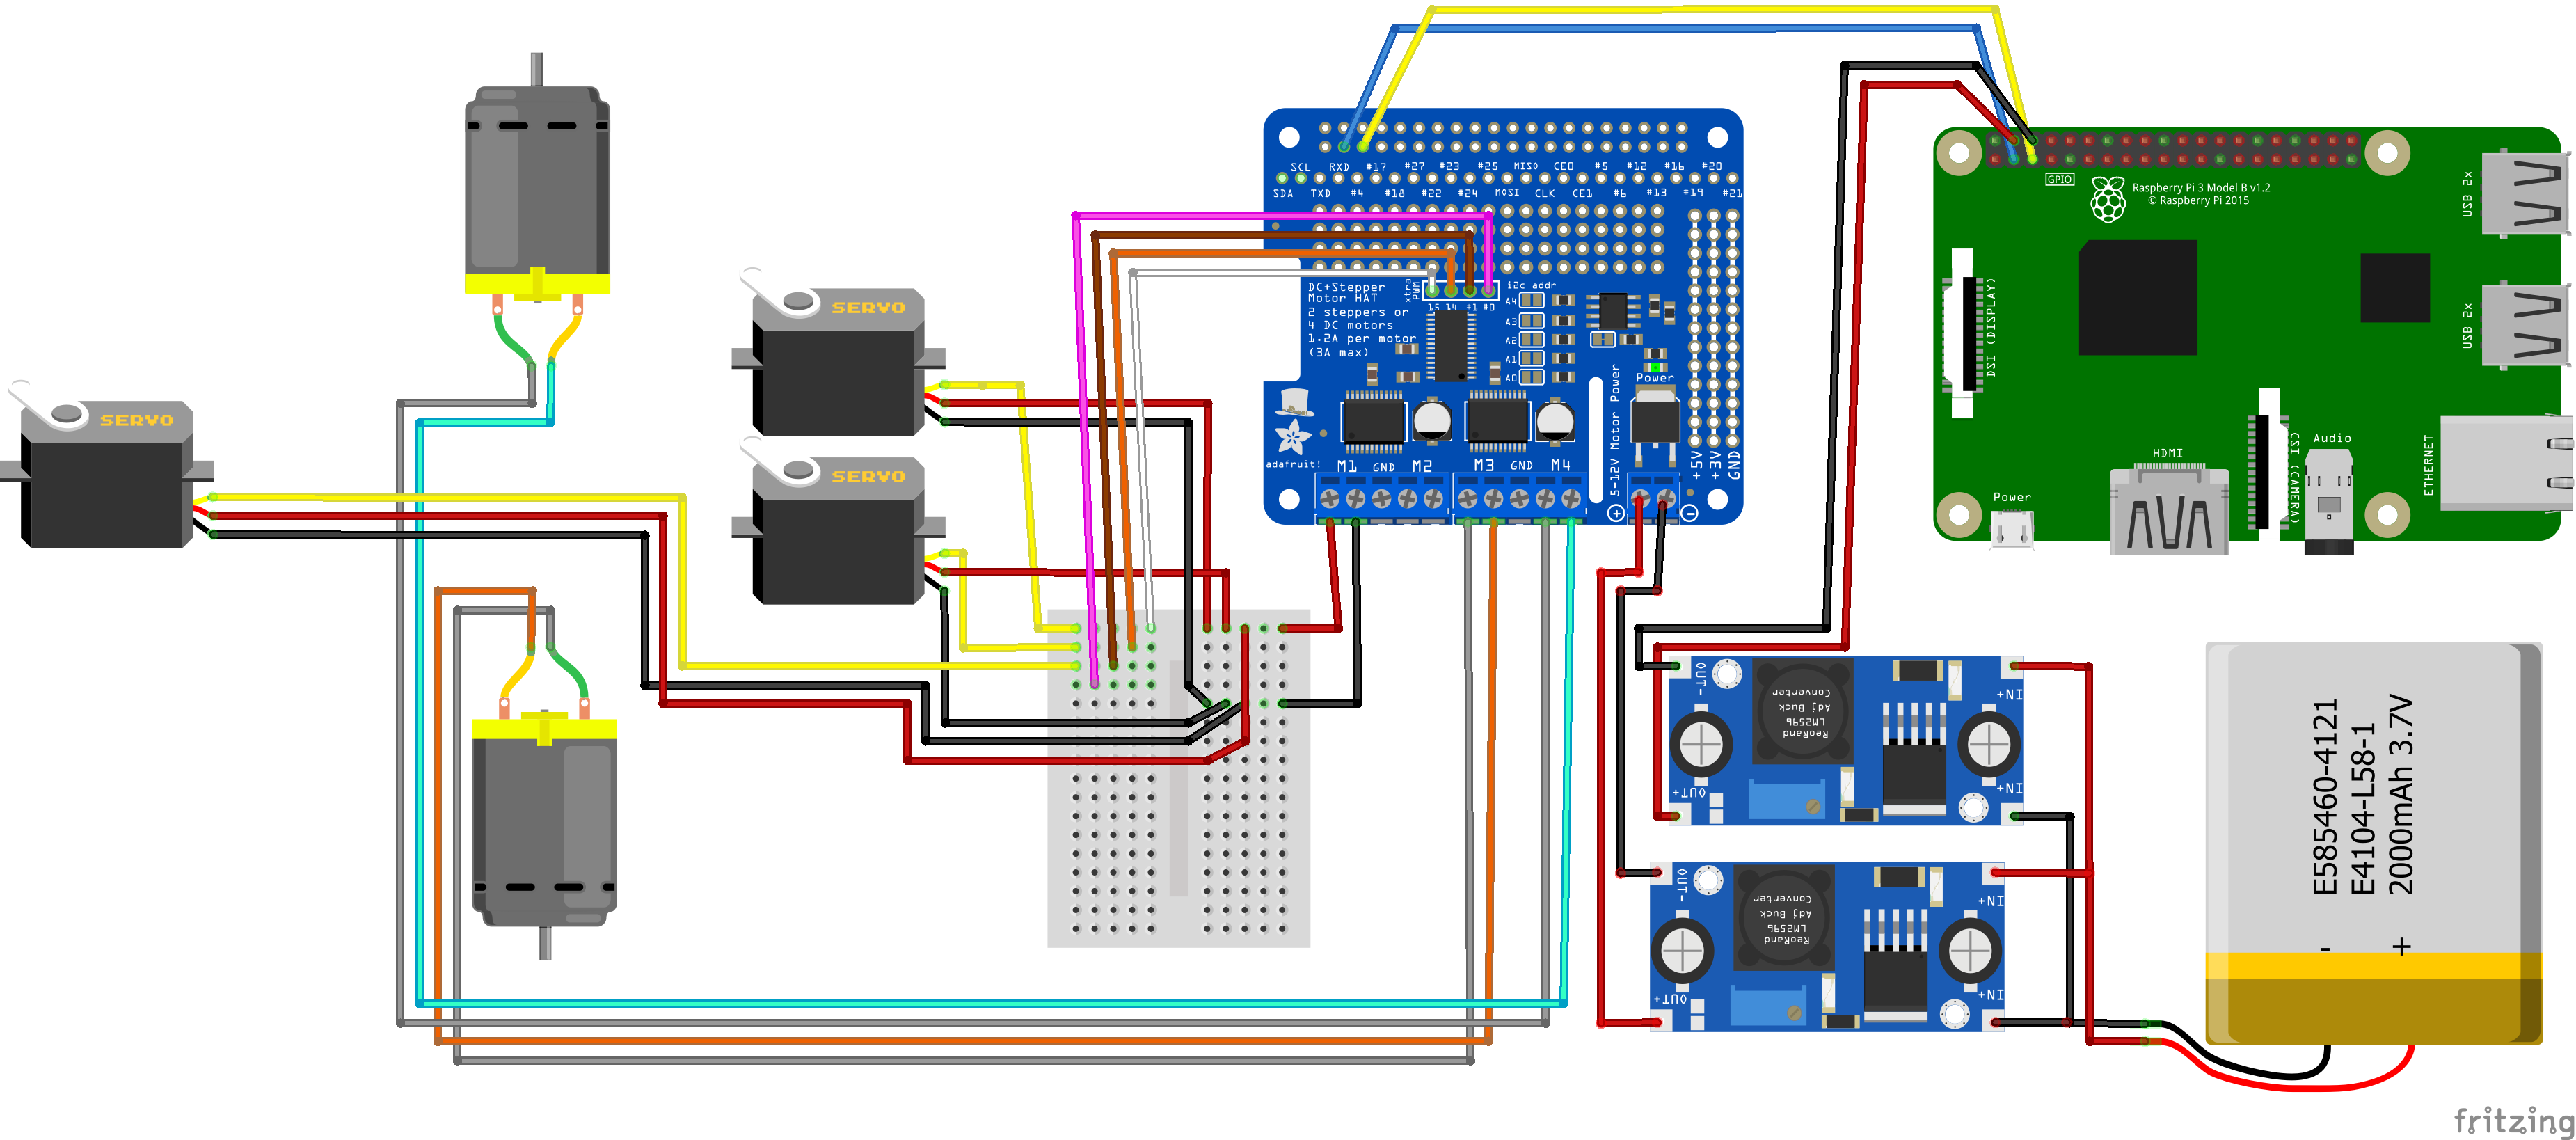
Note: I'm powering the servos through the H bridge
1. Download and install Raspbian Stretch Lite. Use Rufus or Etcher to burn the .img to an SD card
2. Find the IP address of your pi and SSH into it or use the HDMI port to login and find the IP. We will assume the rest of the steps you have a terminal (ssh) access and can run commands.
3. Run: sudo raspi-config. Connect to the wifi, enable i2c
4. Install i2c-tools and make sure you detect your motor hat. to learn more read about raspberry pi GPIO here and Adafruit motor hat here.
4.1 Run: sudo apt install i2c-tools
4.2 Run: i2cdetect -y 1
You should see your devices detected at address 60 and 70:
pi@raspberrypi:~ $ i2cdetect -y 1
     0  1  2  3  4  5  6  7  8  9  a  b  c  d  e  f
00:          -- -- -- -- -- -- -- -- -- -- -- -- --
10: -- -- -- -- -- -- -- -- -- -- -- -- -- -- -- --
20: -- -- -- -- -- -- -- -- -- -- -- -- -- -- -- --
30: -- -- -- -- -- -- -- -- -- -- -- -- -- -- -- --
40: -- -- -- -- -- -- -- -- -- -- -- -- -- -- -- --
50: -- -- -- -- -- -- -- -- -- -- -- -- -- -- -- --
60: 60 -- -- -- -- -- -- -- -- -- -- -- -- -- -- --
70: 70 -- -- -- -- -- -- --
5. Install git, python, pip
5.1 Run: sudo apt install git python3 python3-pip
6. Clone the runmyrobot repo
7. Install Adafruit Motor Hat Library
7.1 Run: cd /usr/local/src && sudo git clone https://github.com/adafruit/Adafruit-Motor-HAT-Python-Library.git
7.2 Run: cd /usr/local/src/Adafruit-Motor-HAT-Python-Library && sudo python setup.py install
8. Sign up for LetsRobot.tv account, get your robot id and camera id
9. Enter your robot and camera ids into the start scripts
10. Launch start_robot!
Base |
||
| Tank Chassis | $106 | Amazon.com B077HMY3YK |
Battery - pick 1 |
||
| Battery Style 1 - RavPower 26,800 mAh USB Battery | $90 | Amazon.com B01LRQDAEI |
| Battery Style 2 - 2x Pcs Floureon 2S 7.4V 5200mAh 30C LiPo RC Battery | $27 | Amazon.com B06ZZ8TCNV |
Electronics |
||
| Raspberry Pi 3 B+ | $40 | Amazon.com B07BDR5PDW |
| Logitech C920 Webcam | $60 | Amazon.com B006JH8T3S |
| Adafruit DC & Stepper Motor Hat | $26 | Amazon.com B00TIY5JM8 |
| PAM8403 3W+3W DC 5V Mini Stereo Audio Amplifier | $7 | Amazon.com B078VTYQMT |
| 2x Pcs LM2596 DC to DC High Efficiency Voltage Regulator 3.0-40V to 1.5-35V Buck Converter | $10 | Amazon.com B076H3XHXP |
| Arduino Pro Micro 5v 16mhz (price for 3) | $21 | Amazon.com B01MTU9GOB |
| INA219 INA219 I2C Current/Power Monitor Sensor (price for 2) | $10 | Amazon.com B07L69L3J9 |
Servos |
||
| 2x Pcs MG995 Metal Gear High Speed Torque 12kg Servo | $26 | Amazon.com B00M8TXSBO |
| Gripper from 6DOF arm kit - no servos included! | $41 | Amazon.com B01NBBBE21 |
| Gripper from 6DOF arm kit - WITH servos included! | $60 | Ebay.com 112923829325 |
Connectors and Hardware |
||
| 20 Gauge Silicone JST Connector, SIM&NAT 5.9 inch | $8 | Amazon.com B071XN7C43 |
| Generic 4.0mm 4mm RC Model Battery Male Banana Gold Plated Bullet Connector Plug For RC Lipo Battery | $8 | Amazon.com B01CJMVY74 |
| 100Packs 3.9mm Brass Bullet Male & Female Wire Terminals Connector | $9 | Amazon.com B075T13MTM |
| #2-56 UNC Stainless Steel Phillips Pan Head Machine Screws Nuts Assortment Kit (#2-56UNC) | $13 | Amazon.com B07BWBPV5G |
3 watt Speaker pulled from an old pair of computer speakers
Wires, Cable Shink Tube, Headers, Resistors, Bare PCBs
2019-03-08 Add IMU and XL4015 efficiency info
2019-01-20 Tank Bot V7 Photos
2019-01-16 Tank Bot V6 Photos
2018-12-18 Motor Fritzing Diagram
2018-12-17 V5 18650 Battery Pack
2018-12-10 Aluminum Camera Bracket
2018-12-04 Video Overlay Info
2018-11-30 Published